I am obviously not a very faithful practician of Christianity. That much should be inferred from this site. I employ more secular forms of ethics, which deviate from the religious system of absolutes.
So what is this edict of giving something up for a few weeks to demonstrate piety about? Is it a moral reset to prevent personal decadence? The practice doesn’t make me feel like a better person. Would I give up caffeine and explain to my coworkers that I’m incredibly cranky and late to meetings because I’m currently trying to appreciate Jesus’ suffering? I fail to see the net gain for anyone in that scenario.
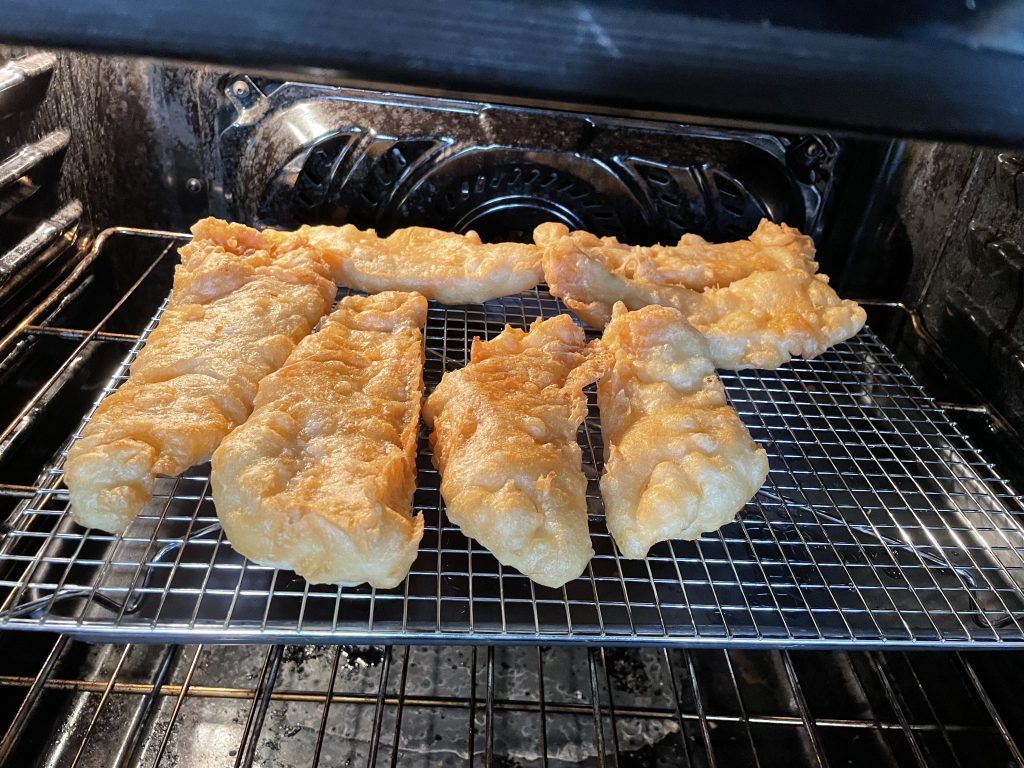
But as it is, Christians eat fish on Friday during Lent for this reason – because it’s giving up “meat” for one day a week and therefore a personal sacrifice. I don’t think this lesson is very effective, given the ubiquitous excitement for Friday Fish Frys and the restaurant deals that run during this time. Eat a fillet of fried cod instead of a burger? Oh darn. Such a demonstration of faith! Such self-inflicted suffering!
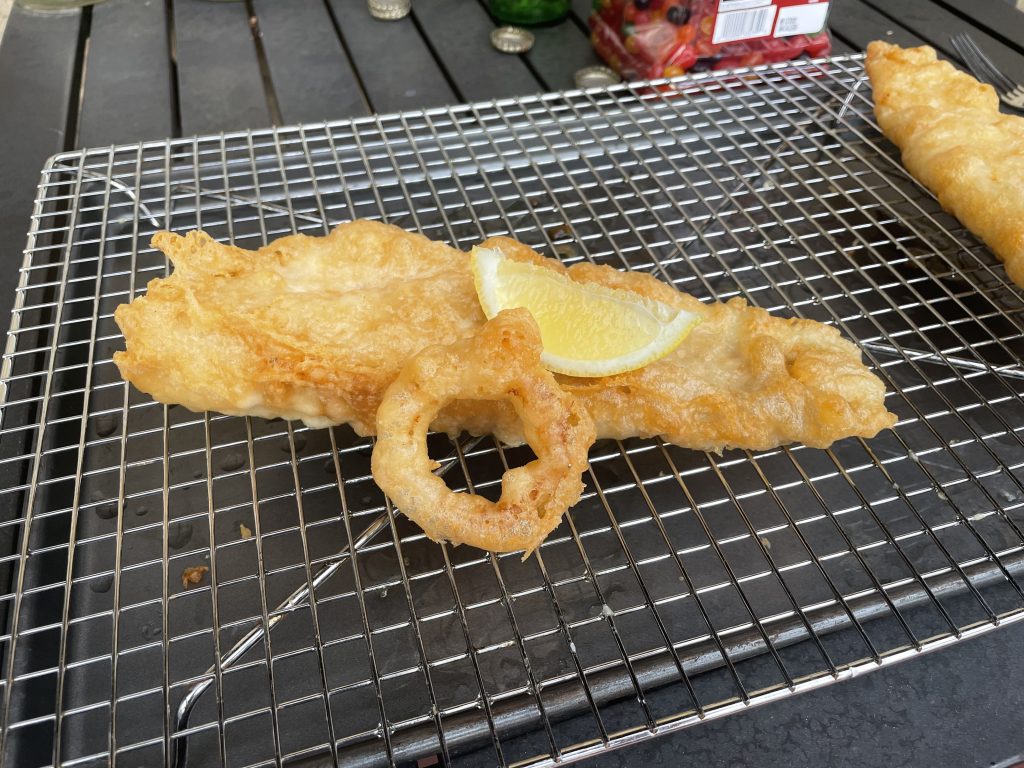
Whatever the reason, it’s also tradition. I like fried fish, any my in-laws like Catholic customs. So here we can align on the end goal, if not the reasoning. Fish fry it is!
Plus onion rings. Yum!
But wait! It gets better.
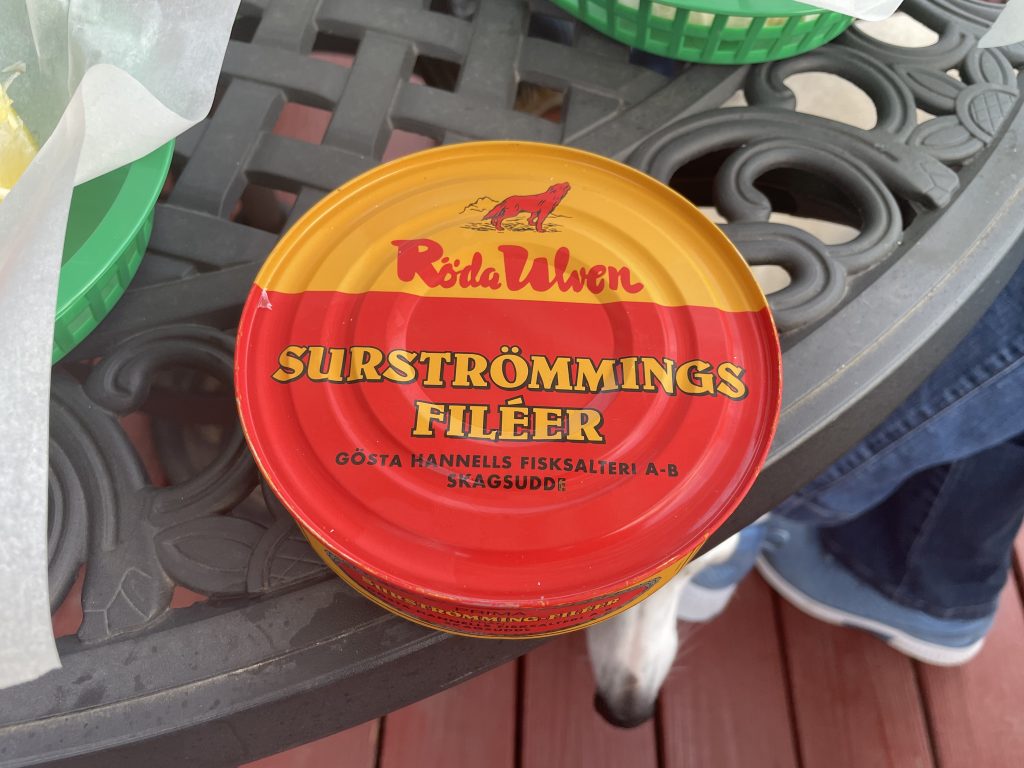
If we’re going to eat fish and “suffer” for Jesus, let’s actually suffer. This can, gifted to my by my sister several years ago, contains Surströmming! Dun dun dunnnnnnnn. Frequenting the top of many a lazy blogger’s “stinkiest foods in the world list”, this funky fish hails from Sweden. What begins as an already stinky fish – herring – becomes enhanced through years of fermentation. I thought shrimp paste and fish sauce were bad. Oh no, Asians got nothin’ on the Scandinavians.
Having passed this can back and forth with my mother-in-law who talked a big game but then chickened out, it made a fitting appearance at our annual Catholic fish fry. And, ignoring cautions from my sister about opening it under water, I dug in a can opener with conviction and promptly sprayed the deck with primordial marinade. But at least I opened it outside.
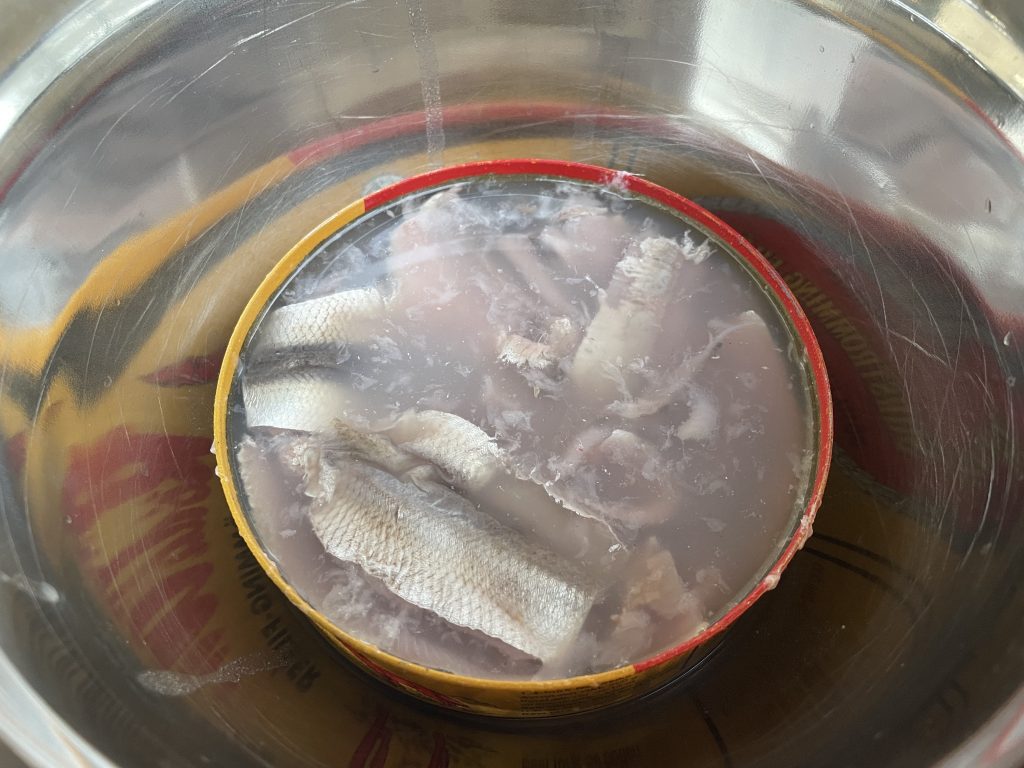
Imagine a sweaty foot stepping on a washed up dead fish in a saltwater marsh. Apply that visual imagery to your sense of smell and you’d be close. Then think of that bag of greens you left sealed in the bag in the fridge until they got slimy, combined with a raw fillet of fish that you didn’t get to in time but wondered upon discovery if it wasn’t too late too cook and opened to find out. That would be how it tasted – as well as how it felt.
Traditionally, it’s meant to be served in very small portions upon other strong foods – somewhat in concept to a solid version of the aforementioned fish sauce and shrimp paste. Sensing a lack of group interest, however, I decided to dive right in and get the experience over with.
I could sort of comprehend a culinary use. My conclusion, however, was that this was invented by an old Swede who couldn’t taste anymore and kept yelling at his kids to feed him something nice and fishy like he remembered.
Points for bravery at least. Perhaps the Vikings of old, and Jesus, would be proud.
Fast food occupies an interesting niche in American cuisine. Supplanting street food vendors and pre-made automat-type meals, it promised quick calories with consistent taste and a guarantee of food safety. Indeed, the OG of fast food is White Castle, because in a time of questionable food quality, no one trusted the hamburger – a skepticism that should be continued into present times, I might add. But White Castle ground their own meat on-site and in view of the customer (originally, anyway). Sanitation was prioritized, with everything from the wall paint to the employee uniforms being bright white so as to convey this. And to top it off, they pioneered the first version of the fast food assembly-line system adapted for use by all modern fast food. McDonald’s made it famous, but White Castle started it.
So fast food is clean and quick. But wait, there’s more: all kids love fast food because it’s food that mom didn’t make. And it’s food that a male figure usually promoted for consumption when mom wasn’t around, because it was easy to procure and relatively cheap (also food that mom wouldn’t approve of). What does this lead to? Nostalgia. My own Grandpa said that when McDonald’s first started, their burgers were terrible. But he loved shoveling his grandkids into that giant farm truck for a McDonald’s run anyway.
My point being: fast food is inherently American because it checks all the boxes that Americans value: quick, affordable, reliable, and nostalgic.
The internet would have you believe that fast food prices have not significantly outpaced inflation. And that’s because the internet lies. AI simply aggregates data and forms conclusions, but it’s not very good yet at vetting sources of that data. Yes, flagship menu items follow this rule, but value menu items do not. In 2005 I could get a .39-cent Taco Bell taco, which equates to .66-cents today. The cheapest option currently on offer? $1.29.
Still, fast food has cornered the market of the young and lazy, because: quick, affordable, reliable. Also the young haven’t figured out how to cook yet, or make good financial decisions. And they don’t suffer yet the digestive problems that fast food causes their elders. But this doesn’t stop fast food from continually trying to expand their customer base to older people. Because, as the one American value criteria not being satisfied by the young and lazy: nostalgia.
I admit – it’s satisfying to be pandered to. No wonder the boomers are so self-important, having received this most of their lives! And now it’s my turn. And in this case of nostalgia and fast food, I will call out two products from my time which have been rebooted recently: The Arch Deluxe, by McDonald’s; and the Chicken Twister, by KFC.
The Arch Deluxe was a failed burger from an attempted premium line of menu items. It included additional ingredients that I’d consider pretty basic for a bacon cheeseburger with lettuce and tomato, but that was enough for me to desperately want to try one. But even if mom were willing to buy one, they were never in our select market. Ultimately it died out, but I did manage to grab one once on a Boy Scout trip once. I remember the commercials for it being weirdly hostile towards kids, which might have had something to doom it when being offered from a company whose mascot was a clown encouraging kids to have a little fun. The Arch Deluxe is now the Big Arch, but I’d consider them more or less the same thing, aside from marketing. The former was meant to be a luxury option, the latter just a bigger option. As this is fast food, I say whatever. Same crap ingredients. (If they ever bring back the Angus Mushroom Swiss burger, however, then we’re on a different level.)
The Chicken Twister was just a couple boneless chicken tenders in a wrap with lettuce and some spicy sauce. It was great at the time because it was slightly cheaper than a sandwich and easy to eat while walking – perfect college requirements. I never did understand why it was discontinued, so it must have been company economics in this case rather than consumer perception. I had often declared that I’d get one the moment they were brought back.
So, how did they stack up to expectations? First, a bit of internet meme-ing is required. I encourage you to find the Chris Kempczinski video.
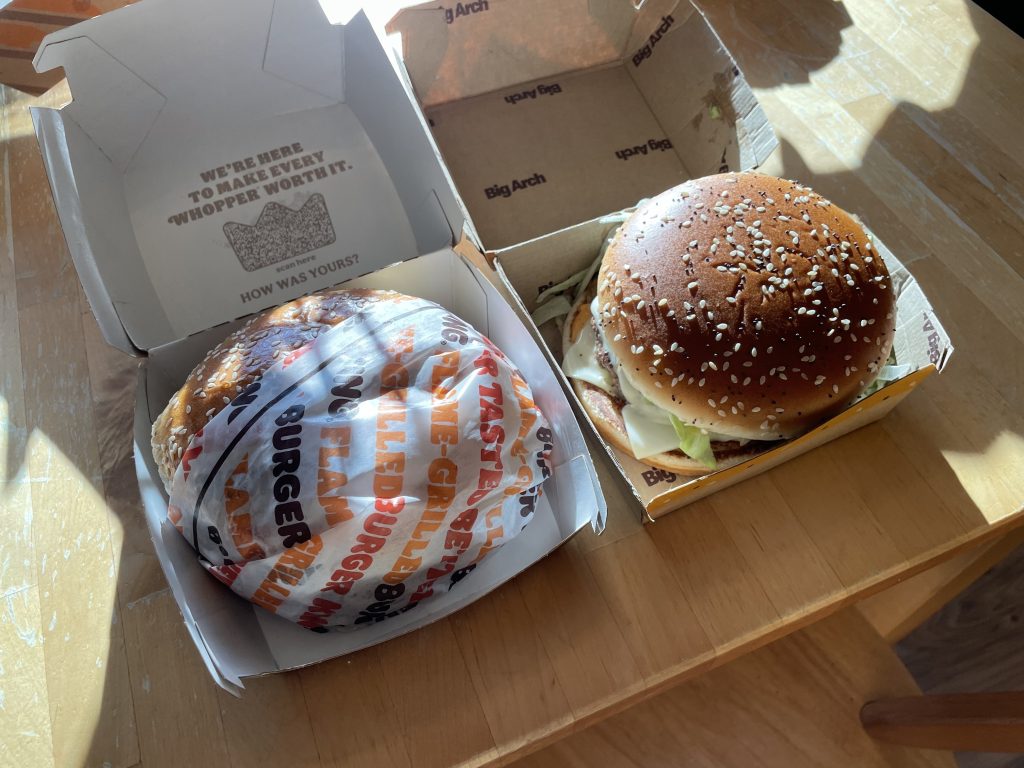
Found it? Good. Because that led to an additional experiment on top of whether these products were any good or not: Big Arch vs Whopper. Because that was Burger King’s response: at least pretend that you as a company executive actually enjoy eating the company offerings. We would take this opportunity to make a comparison ourselves.
The last time I had a McDonald’s burger, it was a quick grab on the road. It was the first time I used one of those kiosks they have now inside. Apparently, that wasn’t the standard procedure, as I received some weird looks from the staff. I’m uncertain as to why, but I’m guessing their usual demographic prefers to order via their mobile app, because…apps are cooler? Maybe coupons? Dunno. Whatever. The burger was the expected sponge-beef on a puffed cardboard bun. The Big Arch was, however, surprisingly good. A little heavy on the sauce, but they had apparently replaced the sponge and cardboard with actual bread and griddle beef like I remember from the old days. Of course, inflation-adjusted, it’s still overpriced, but it actually tasted like good ol’ McDonald’s.
The Whopper, however, was a bland and dry basic burger. McDonald’s “wins”. I then spent the evening groaning and massaging my gut.
Would I buy the Big Arch again? Probably not. If I were in my 20s then yes, but if I were in my 20s it wouldn’t hold any nostalgic value. So, I call this a fail.
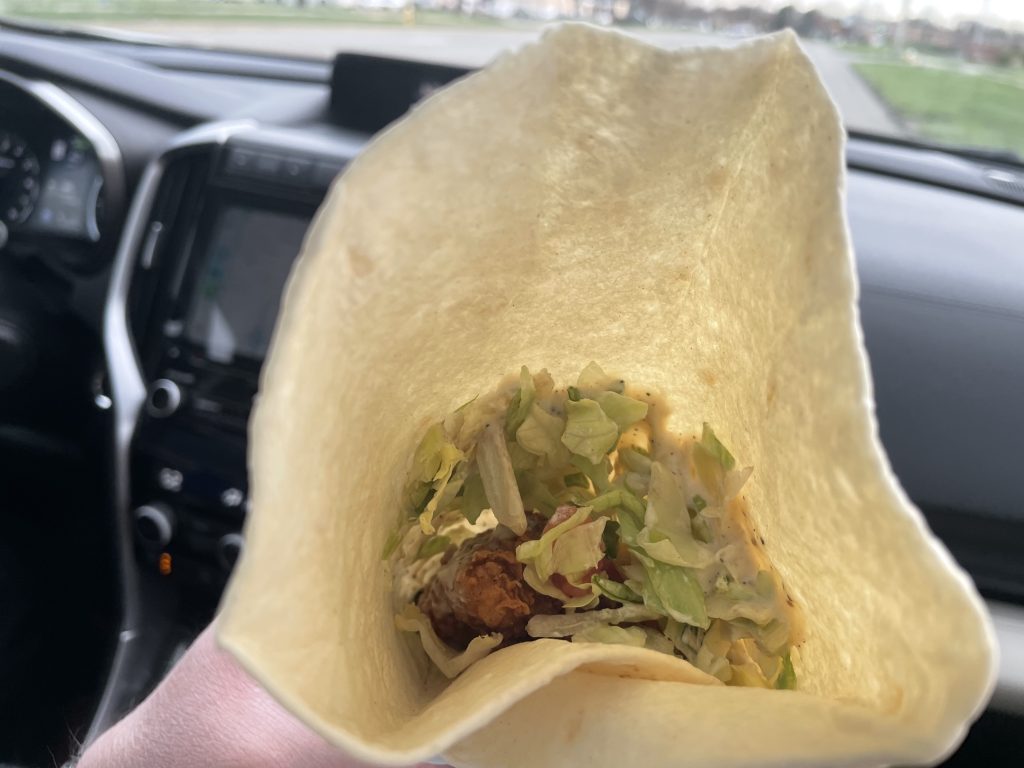
Moving on, the Chicken Twister. These things were so damn good and I couldn’t wait to try one!
Okay, so apparently someone failed to explain to staff that the tenders are supposed to be lined up the length of the tortilla, not thrown into one end. That, or whatever stoner assembled this just didn’t care. What’s wrong there, Chad? Overdue for your vape break?
In any case, some reassembly was required, negating the product’s convenience. As in, half the tortilla needed removing.
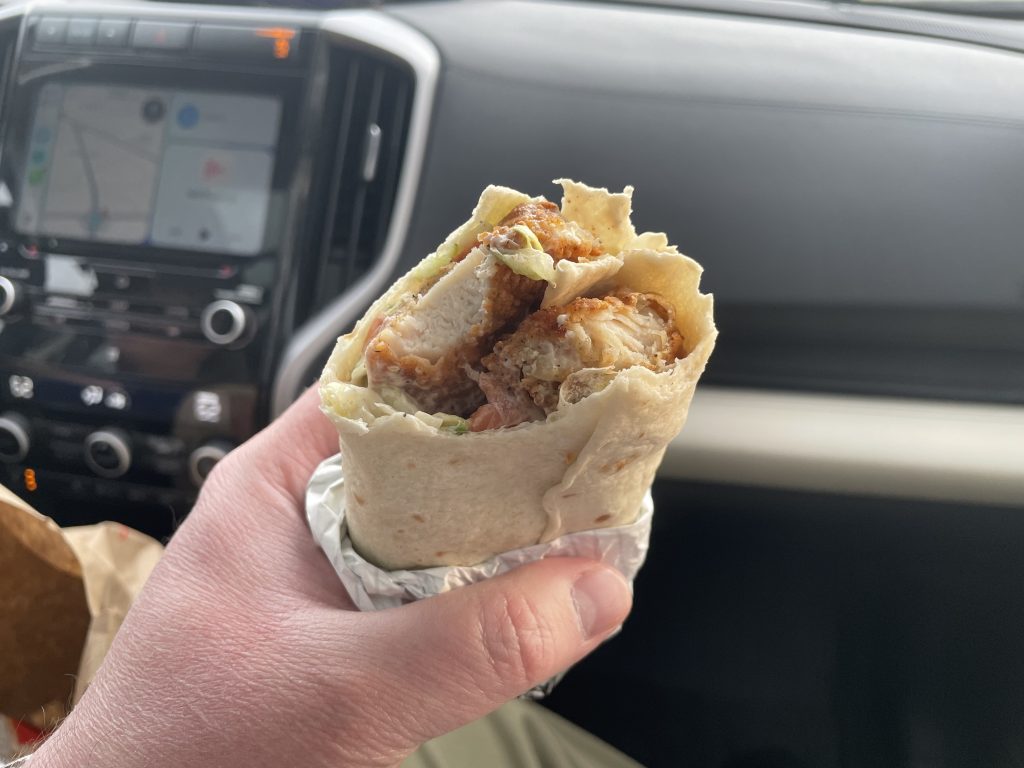
There we go. Once that part was corrected, it once again resembled two chicken tenders in a tortilla with some sauce and lettuce. It was…okay I guess. Even if it had been flawlessly presented at a reasonable price by a Chad without attitude, it still would have remained a lackluster attempt at a millennial throwback. Another fail.
There’s a few lessons from this experience:
The overall quality in fast food has declined across the board, due to streamlining production methods and by reducing ingredient costs. Even if current products were made as they were originally, which they aren’t, they would still fail to live up to ingrained memory expectations.
People with any sort of economic means don’t regularly eat fast food. Even Kempczinski could barely stomach the thought of eating his company’s flagship reveal. It’s simply just not good nutrition, nor good quality.
The demographic trying to be captured here using nostalgia is a demographic who, through aging in general, has achieved economic means. And even the ones who haven’t are still…
…old now, and can’t eat that crap food without painful consequences.
Conclusion: attempting to use nostalgia for marketing purposes in the fast food industry is dumb. You’ll get us to try things once, then we’ll laugh, poop, and never buy them again. But at least I had a fun time going down memory lane. You sold me that much at least.
About two years back I planted sunchoke tubers in the forage patch. I caught on to the idea after reading some random gardening article during the height of the Ohio winter season and thought that they sounded like a good idea: native, low-maintenance, pretty flowers, edible tubers, perennial. What’s not to like?
They were also amusingly absent from any commercial catalog, so I had to source some from a fellow gardening nerd. They cleared postal inspection, unlike the black bean seeds my sister tried to send me, and I dutifully plopped them into the ground come early spring. A few plants grew, but I decided to wait an extra year for them to fill out before attempting a harvest.
Now that the growing season is concluded, I wanted to try them. So I shoved a gardening pitchfork into the partially frozen ground at the edge of the patch and ripped up a mass. A surprisingly large mass, in fact. It would seem that they spread quickly.
Internet knowledge states that they can be cooked like potatoes. So Liz roasted them. And they were tasty – like an earthy parsnip. But, there were consequences.
Sunchokes store their energy in a carbohydrate very different from potatoes, specifically inulin – a polysaccharide. Polysaccharides cannot be digested (a notable exception being lactose, a disaccharide, though we all know isn’t a universal exception). Potatoes, on the other hand, consist of starch – also a polysaccharide, but upon cooking, breaks down into amylose and amylopectin, which are easy to digest. Inulin, however, does not fully break down into monosaccharides upon cooking, resulting in a food comprised of indigestible carbohydrates.
This leads to large amounts of food for gut bacteria, which ferment inulin into….gas! Lots and lots of gas!
So some more cooking research is needed to work around this better. Or…we eat them raw and have a juvenile fratboy-themed competition on the deck!
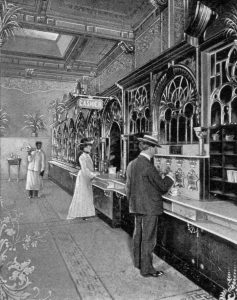
I first encountered this term with a print of the Edward Hopper painting. I’ve always liked his Nighthawks – something about the American diner. That period in our collective history always interested me. The couple out late, grabbing a meal at what was probably the only open restaurant, dressed formally in the manner of the 1940s. A captured moment, open to viewer extrapolation.
But Automat, is older. Late Guilded Age. Money doesn’t fulfill the soul. As we all feel on some level in our present time, access to material goods and comfort also cultivates loneliness and a purposeless existence. Like dining alone in an airport: there’s a degree of success behind the circumstances of the situation, but the moment itself is empty. That sort of thing.
But let’s move on from artistic realism and get back to the Automat itself. Etymologically speaking, the word itself doesn’t appear to have any reference to food. Like we’d use the term “self-serve” today: it doesn’t specify what we’re getting, but it’s assumed that food is involved. It’s a vending machine on a large scale, with diverse origins, if you want to go down that rabbit hole. As a concept, it’s nothing new, but the specific method of application is what defines it: single serving meals, purchased individually, through mechanically automated means.
In American history, it refers to the Horn & Hardart restaurants. They made a few appearances in John Cheever stories, as those were set in the New York City region and surrounding areas. And there’s a cool documentary about them with Mel Brooks. They appear ingrained within a specific dimensional coordinate. So if one makes an appearance in any form of media, it’s a marker for a unique time and place.
But that doesn’t mean it can’t be a useful concept now. As the head chef of my domestic space, there are some constant culinary conundrums when cooking for my coterie:
It can be difficult to make certain meals that only offer 3 portions, like casseroles and soups and roasts.
Leftovers tend to sit in the fridge until they go bad, because no one wants to eat the same thing for lunch the next day, or the day after.
Leftovers banished to the freezer get forgotten, and when remembered, no one wants to spend the time the thaw out the meal again. Plus that’s a whole meal, which means if it’s thawed, that’s what everyone is having for dinner, negating choice.
A good lunch takes too long to make. I’m working. I don’t want to spend that time cooking, only to make a mess and then have to cook again for dinner. And ordering food is expensive.
The natural answer is to portion out the leftovers and freeze them. But that doesn’t solve issue 3. Convenience is a big factor. We need both individual portions that are also quickly accessible. An in, not buried in the deep freezer.
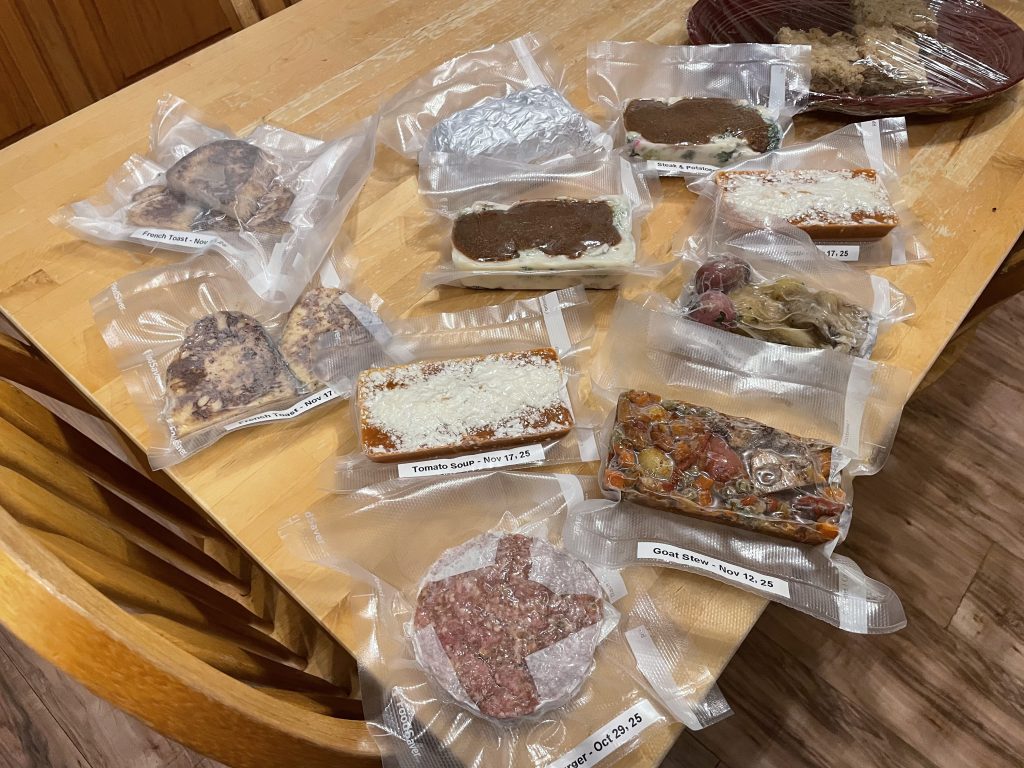
Presenting, Dad’s Automat!:
Placed on the refrigerator freezer door is now a menu list, indicating options which lie within. A selection of items without overwhelming choice. And all conveniently labeled:
So far, it’s sort of working. Items get eaten for lunches, and they’re for the most part healthier than what my kid’s culinary abilities usually conjure up as an after-school snack.
Just don’t tell my sister about the amount of plastic this is using.
Turkey is a strangely non-favorite traditional food. I don’t know if it’s truly the taste, or that mothers everywhere overcook the things. A combination of generational food-safety paranoia combined with the Americana requirement of needing to present a turkey in its whole form to the table (white meat is done at 160F and dark meat at 175F), tends to yield less than satisfactory results. Plus, everyone tends to grab cheap turkey deals. So everyone grumbles a little at the turkey, yet also demands one be served.
So this year’s Thanksgiving attempt experienced some deviation from the norm, and I contemplated a turkey roulade. And according to the internet, I wasn’t the first to come up with this idea. That was encouraging.
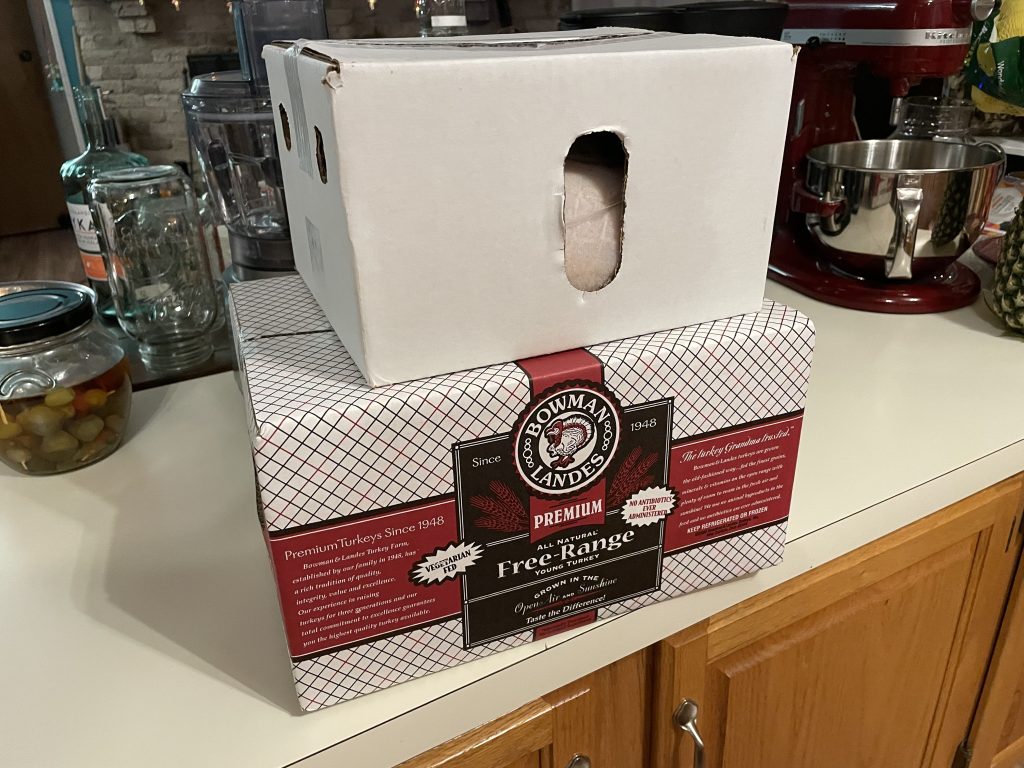
But first, a turkey needed procurement. And some internet pointers. The key ingredient for this method was skin, and since I have yet to see turkey skin being sold as a standalone item, that meant an additional turkey breast to accompany the whole turkey. We were certainly going to have turkey!
But not just any turkey. A Bowman Landes turkey! Because why not? Go with famous local free-range turkey! We were hosting after a 2-year hiatus, so let’s make it special.
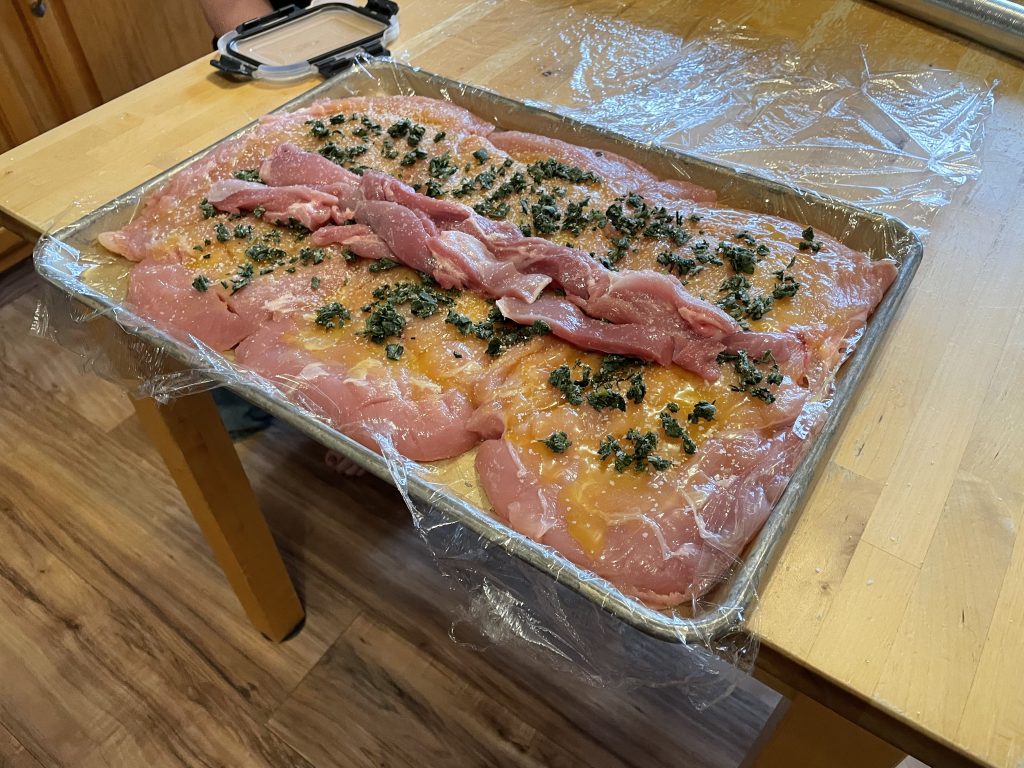
Turns out, the additional turkey breast, needed for the skin, contained an additional half breast. We didn’t need that much, so the remainder is frozen now awaiting a smoked turkey summer evening. Three were sufficient, butterflied and rolled with butter, herbs, and some de-boned thigh meat.
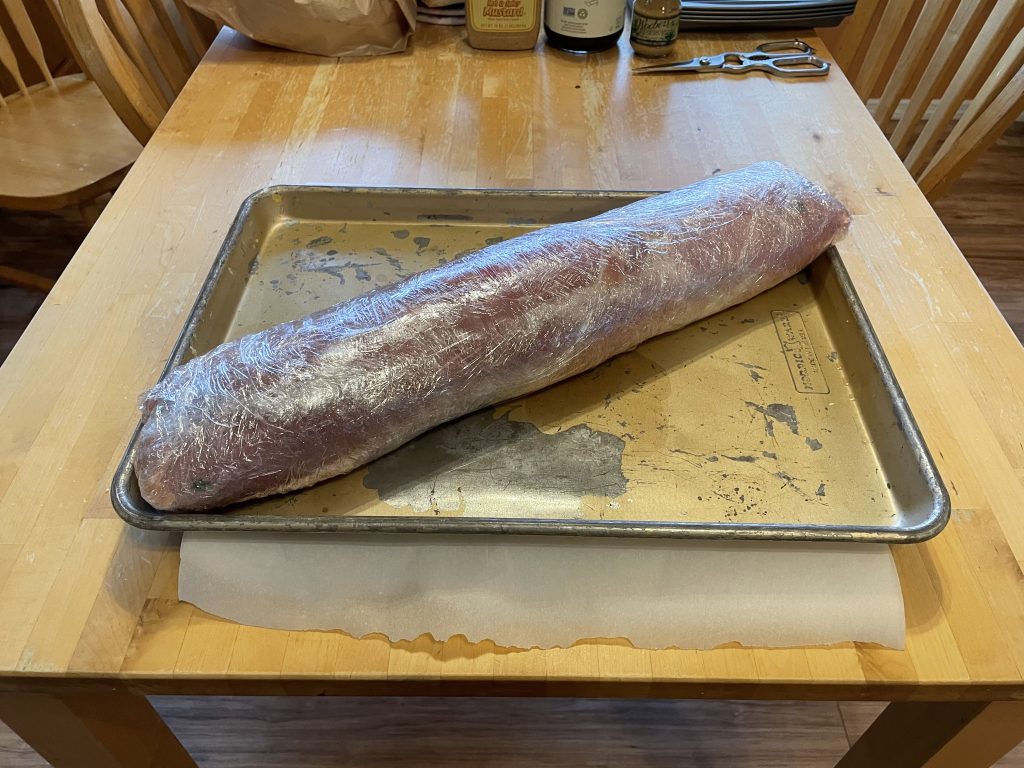
Then rolled in plastic and refrigerated overnight to set the shape.
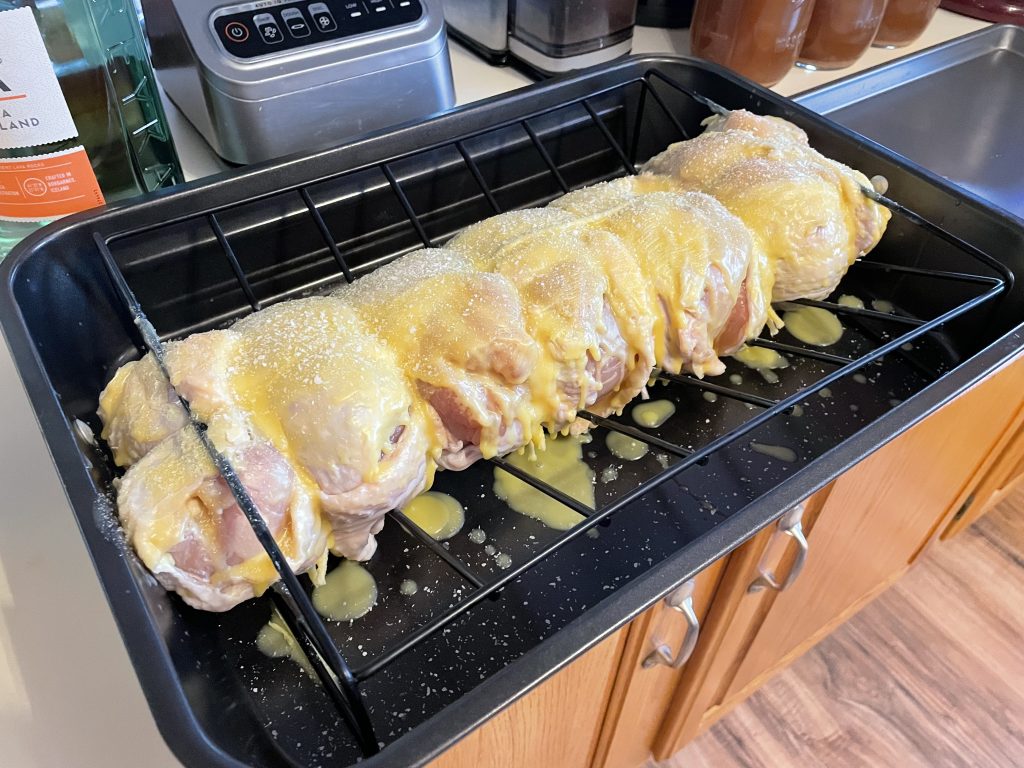
Then rolled in the saved skin.
Baked.
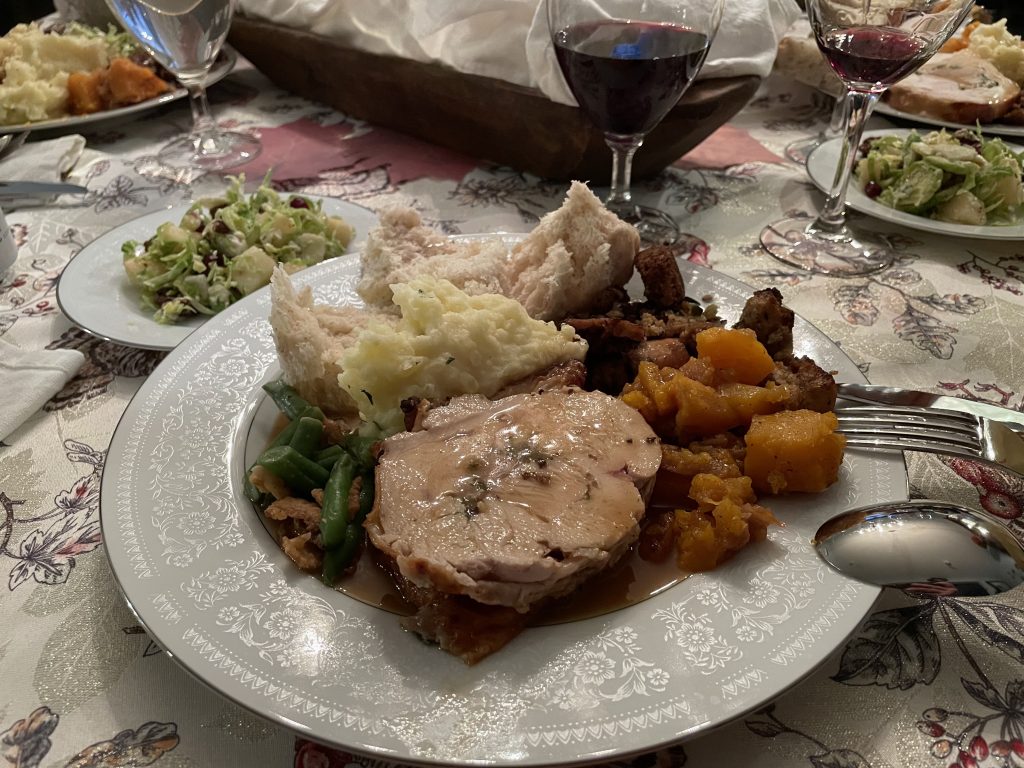
Served.
And plated.
How was it? Not too bad. Certainly easier to eat and less mess at the table, although the white meat was still a tad dry anyway. However, the gravy soaked into the leftovers overnight and solved that issue. Some preparation lessons were learned, and it was more work up front, but worth the effort for something new.