
571 words, 3 minutes read time.
(Did you notice I added word count and read time? I always thought this was silly myself when I come across it, because if I actually clicked on the article, it’s probably going to interest me enough that the world count disclosure wouldn’t dissuade me. But, ADHD as we are, I’ll start providing the courtesy.)
To char-grill, or smash burger? Ah, such is Man’s burden – to be forced to decide between coal-fired crisp or succulent smooshed sear. The former produces thick patties encrusted with Malliard’s magic, but can all too often result in dry burgers that don’t retain cohesion upon flipping. The latter produces crisp edges and juicy interiors, but lacks the char crust and retains too much grease for comfortable digestion. So we must choose a preference, and I don’t like those restrictions!
What if there were a way to have your burger and eat it too?
Introducing: Simon’s Patenty Patented Patty Prep!
Step 1, line a grilling cage with aluminum foil. I prefer grilling foil to those sissy skimpflated hair-dying foil sheets they pass off at the grocery now. No really, I had budget foil melt on the grill before. Don’t use it.
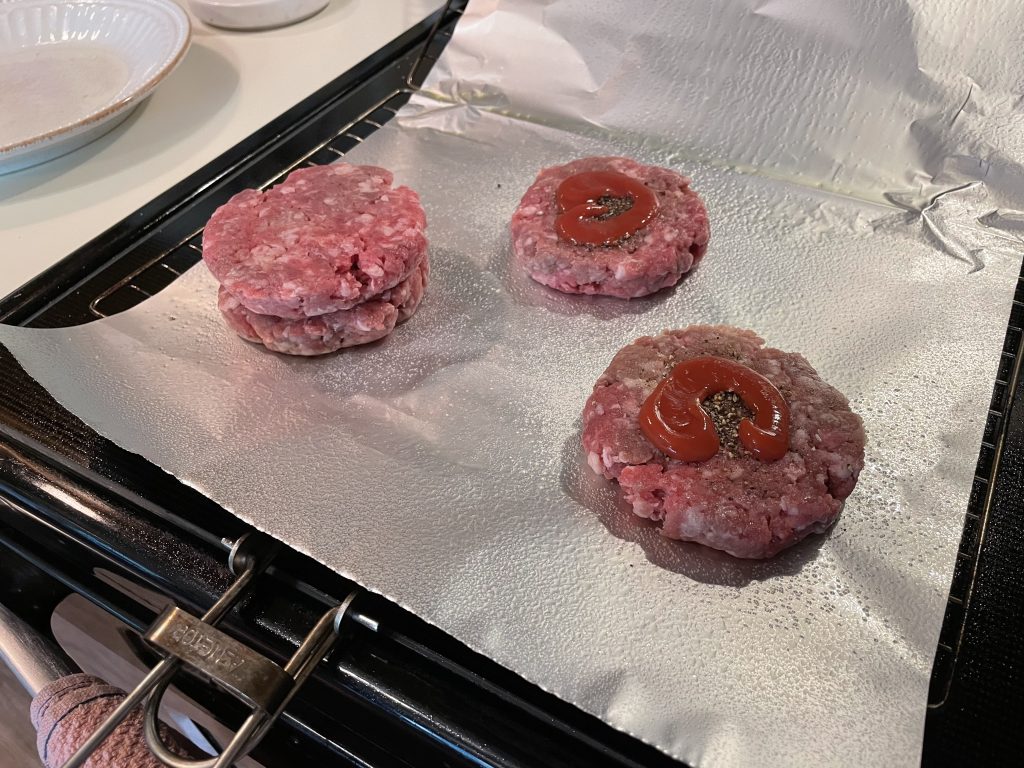
Step 2, spray the foil in oil and arrange your patties. Leave sufficient room between them to allow for smashing. Season.
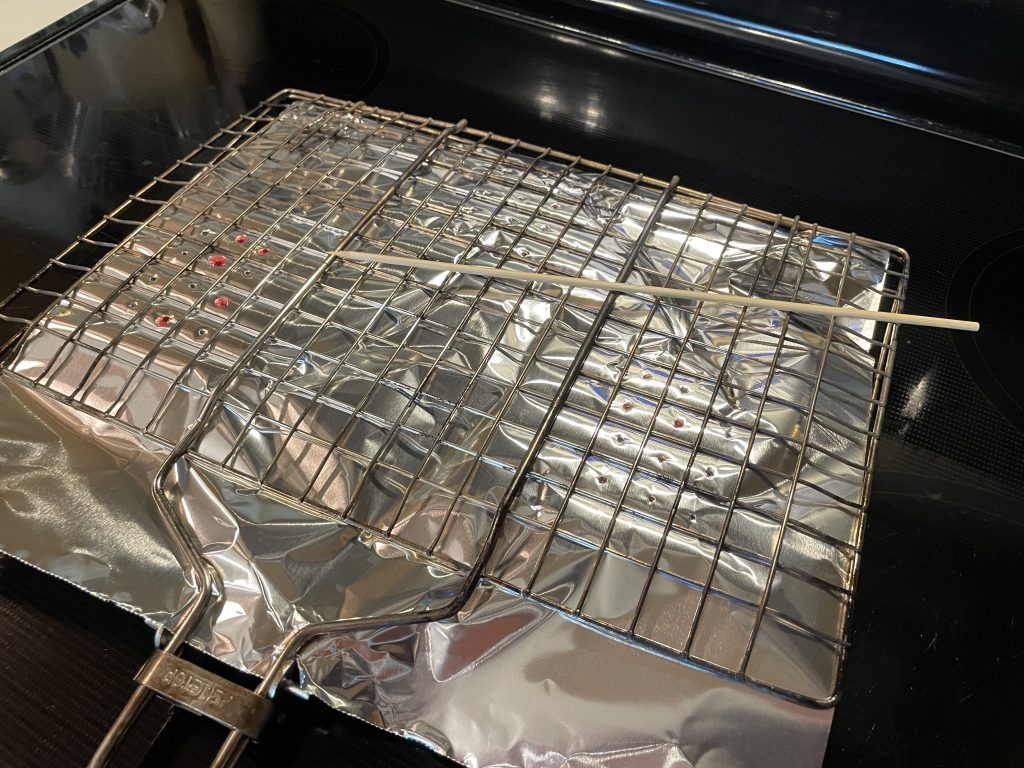
Step 3, close the cage around the foil and patties, and lock.

Step 4, perforate the foil on both sides. This will allow the excess grease to drip out and the smoke to add seasoning.
Step 4, place the cage over direct heat and grill. It will take longer due to the added mass and foil shielding, but be patient and don’t worry about the flareups. They won’t burn. Use an instant-read thermometer to monitor progress. Some of this will be more instinctual since you can’t visually inspect.
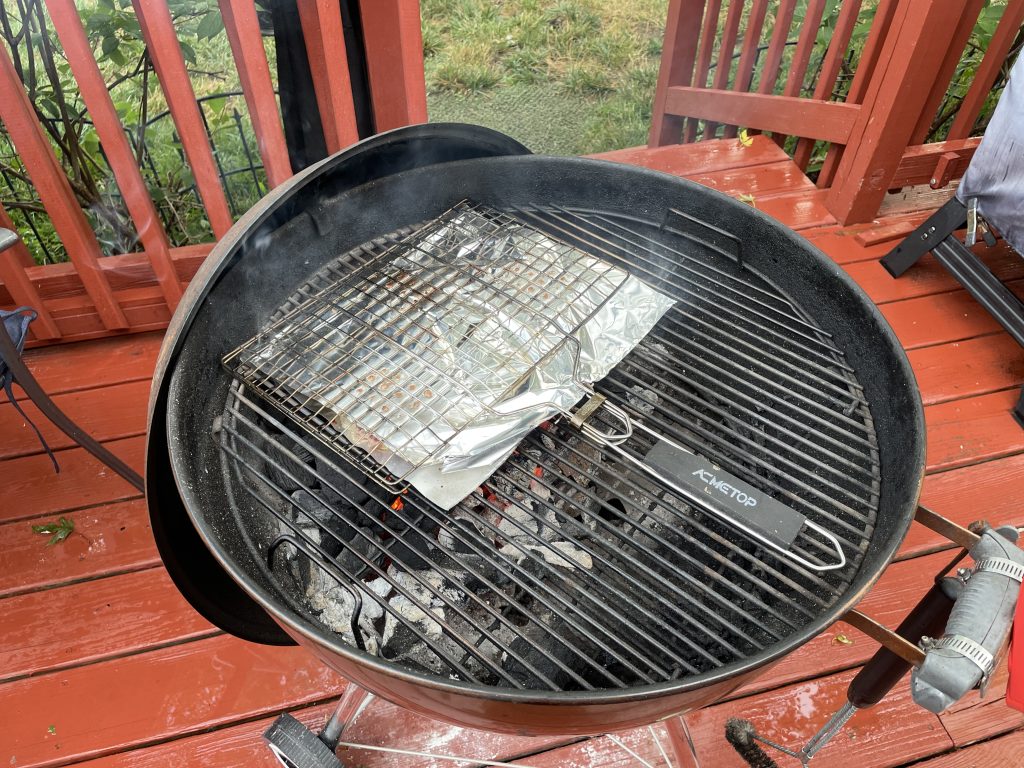
Step 5, flip accordingly, but don’t flip too early or you’ll miss out on browning. Pull the patties when the internal temperature is where you want it.

Step 6, add cheese and rest the patties while still on the foil. It will cool quick enough, but retain enough heat to gently melt the cheese.
Step 7, of course, is to stuff face hole.
And there you have it! No crumbled patties from a botched flip. No need to add binding agents to hold the patties together. Hole size can be customized to determine level of runoff and browning. The slight smash of the cage offers a compromise between char-grill and smash burgers. And the properly-oiled foil doesn’t stick to the patties how even the most clean of grill grates always tends to.
You may license my patent for $1 per patty. Happy grilling.
–Simon