That’s one of those weird Moorhead-isms. 24 hours in a car with your family will do that to you. After the Adventures of Huckleberry Finn audiotapes grew stale and we started commenting on roadside advertisements, embellishments quickly arose and road delirium took its toll.
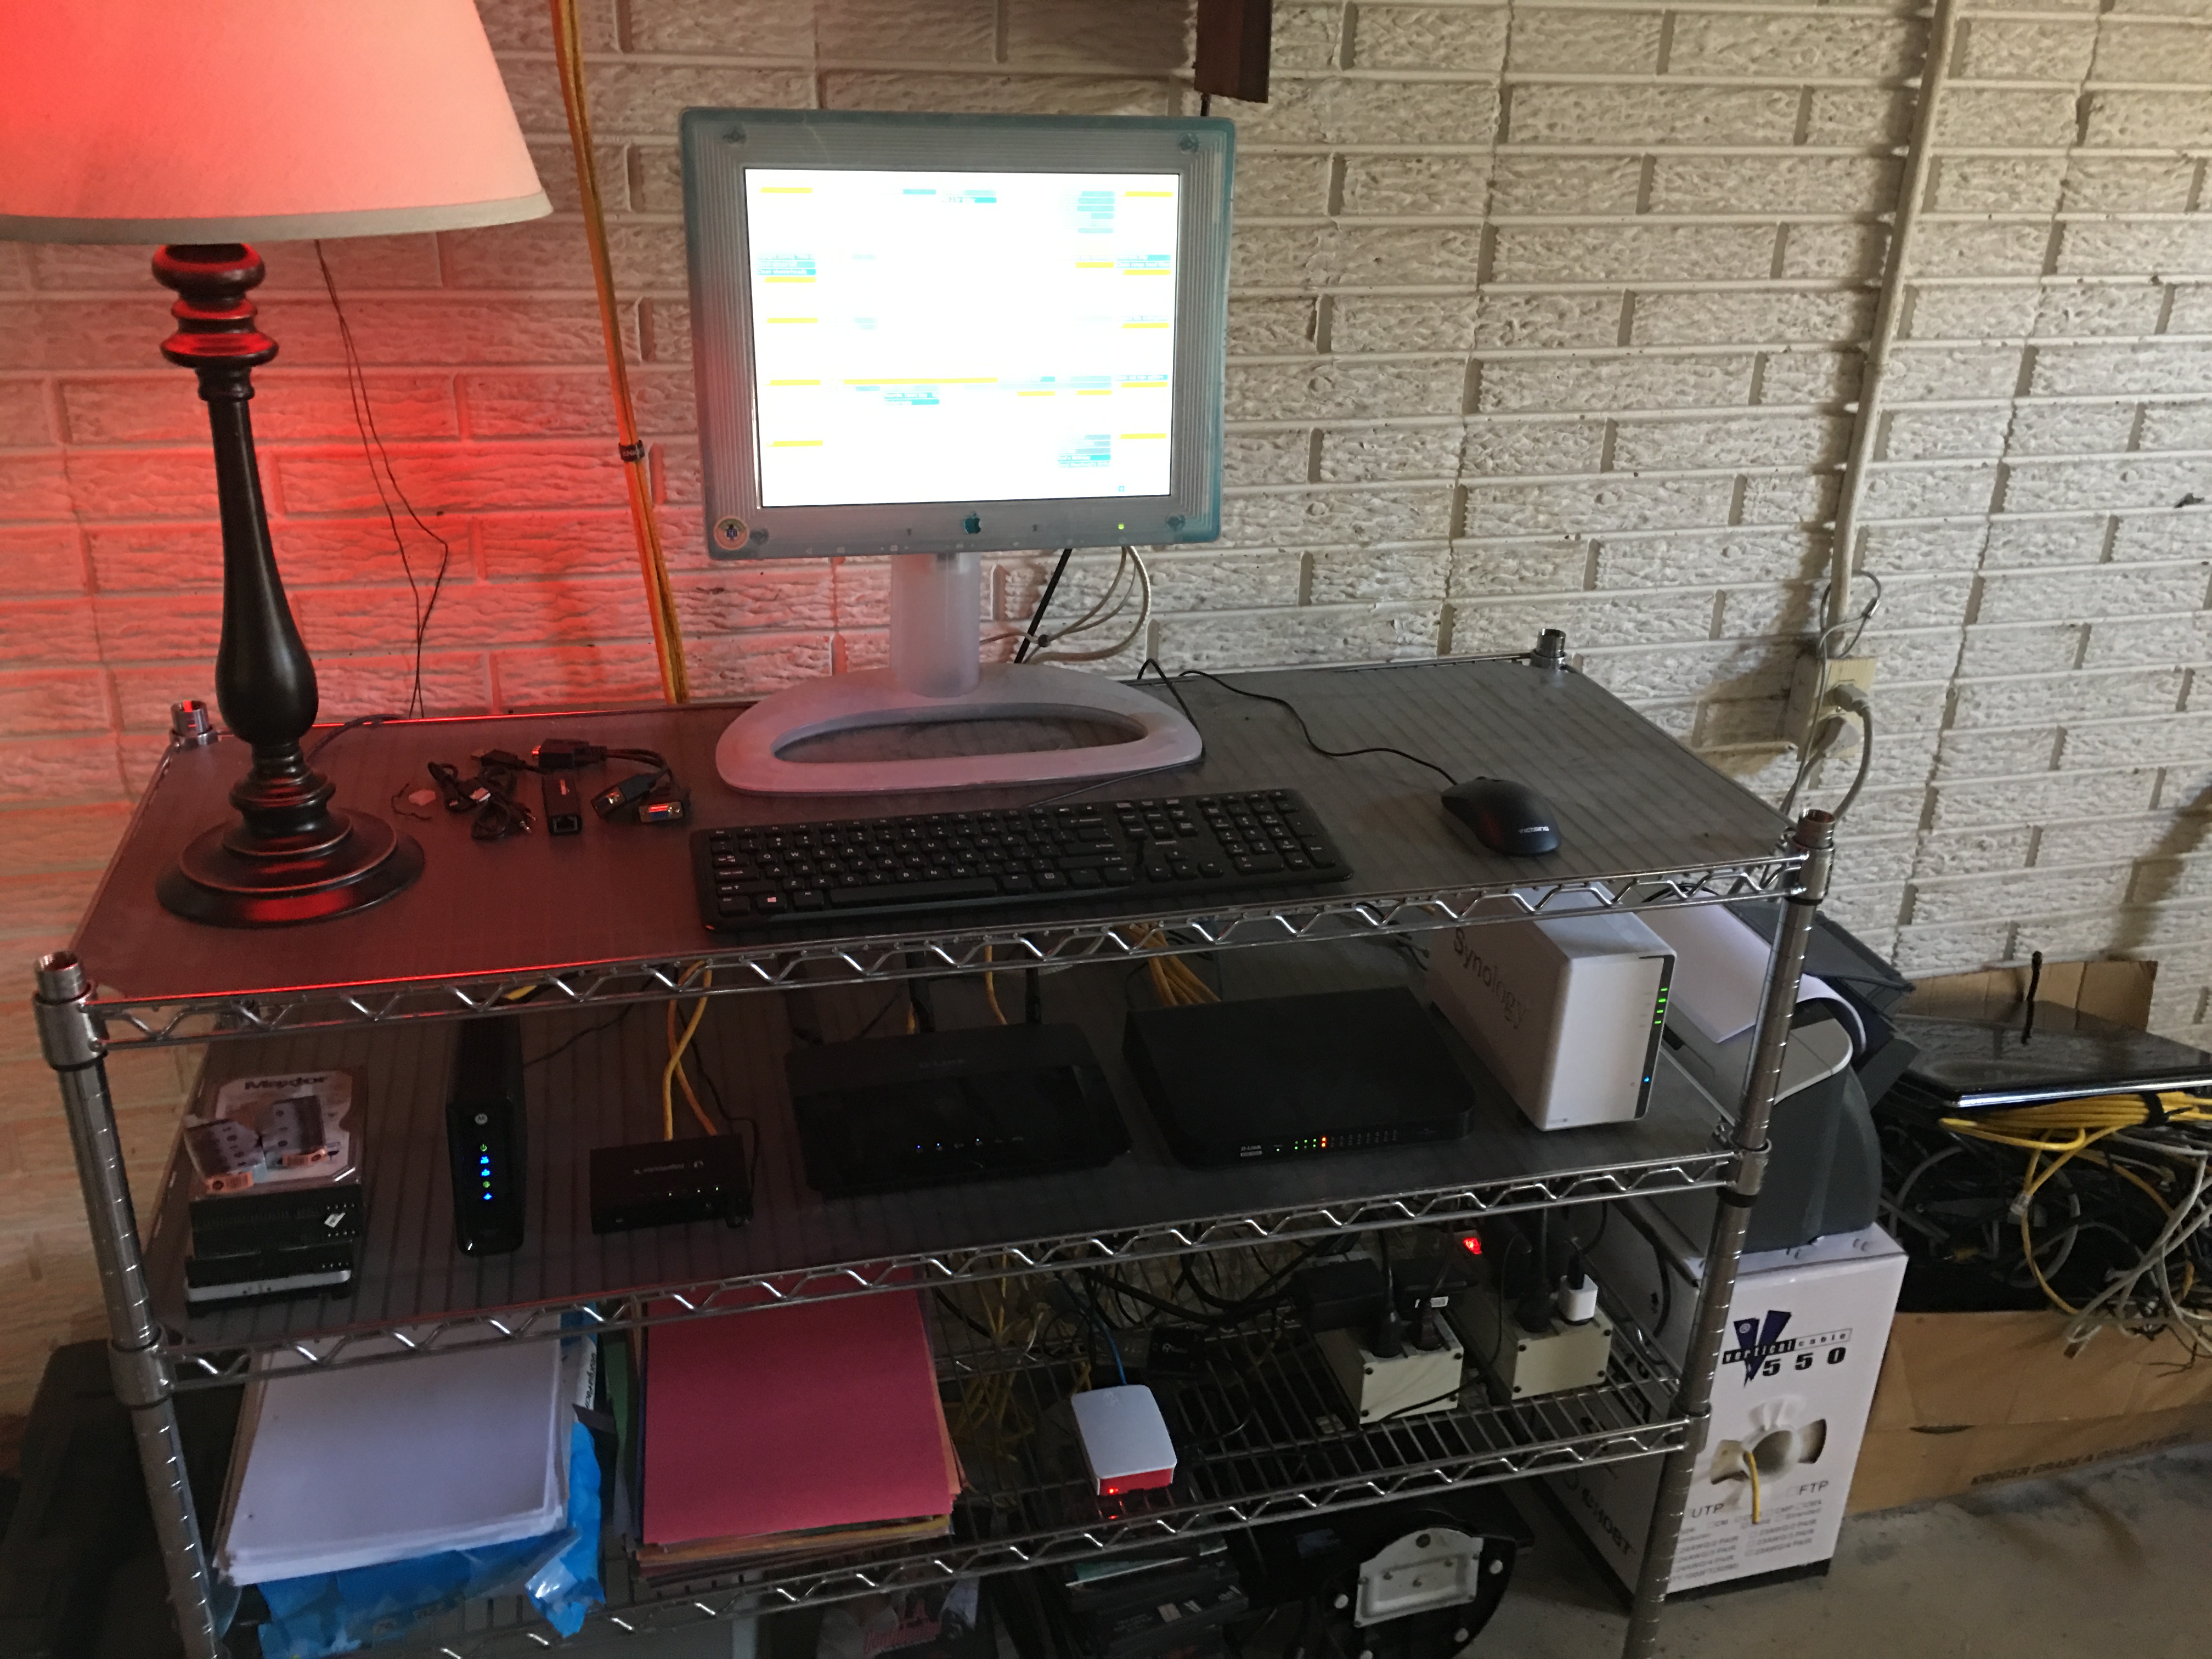
Anyway, my sister bought me a Raspberry Pi a couple years ago. At the time, I think she intended it to be a low cost computer introduction for my daughter. But by the time the kid was old enough to understand basic computer inputs, she had a tablet, so the Pi sat unused. Then I made a dashboard, similar to my recent Xbox project, but this quickly fell into disuse as the Pi would timeout and I’d have to hunt down a keyboard and mouse to refresh the browser again (I discussed this recently). Then I simply plugged it into the network as a Linux experimentation device to self-teach the command line interface. Sudo apt-get upgrade! cd /etc/…uhhhh ls… sudo nano /boot/config.txt… You get the idea. I figured if I really screwed something up, it was a low-risk device I could wipe clean.
The old laptop had been reassigned. Sitting in the basement on the shelf with the network equipment, devoid of battery and working WiFi card, it served as a simple OS to run a web browser. With an external monitor, it ran two windows–my Google calendar, and my weather radar. Then Windows’ on-board SMART monitor detected an imminent hard drive failure. I repeatedly ignored the warning, since I didn’t really care about its longevity and all its data had since been backed up. Then one day the computer installed updates and failed to find the drive upon reboot. Maybe one day I’ll swap the drive and install a Linux distro.
But I missed the omnipresent calendar, so I decided it was time to revive the Pi and once again give it purpose. After all, all I needed was a basic machine that could run a browser (and Windows had been overkill, and a big security hole). So I ordered a cheap keyboard and mouse from Amazon, which I received 2 days later (I love Prime’s free 2-day shipping). I also needed an HDMI to VGA adapter, which Amazon was happy to provide as well. I hooked up that 18-year old Apple LCD display (which retailed for $1,999 at the time; https://en.wikipedia.org/wiki/Apple_Studio_Display#15-inch_flat_panel_.281998.E2.80.932003.29,https://manuals.info.apple.com/MANUALS/0/MA473/en_US/StudioDisplay_15inchLCDSetup.PDF) plugged in the peripherals, and…everything worked instantly, because it isn’t Windows.
After some quick updating, I had the calendar up and running in kiosk mode. All things considered, this was pretty benign, and was almost too easy to feel like a bona fide project. Still, it got me the hour nerd fix I needed.
For the majority of my adult life, I’ve had a preference for D-Link network products. In the early days, before security was a primary concern, the simple ability of a router to even perform NAT routing reliably was a major accomplishment. The old Apple Airport base station that dad had purchased was okay, but was notoriously flaky and required software to administer (rather than the universal browser-based GUI). We had developed a ritualized order in which devices on the network had to be unplugged and rebooted in order to restore connectivity.
Network equipment from 1999–40-bit WEP encryption, awwww yeah!
When I moved into my first college apartment, a friend at the time gave me a D-Link router, the ol’ DIR-524. It did it’s job admirably, though it became dated and thrown into a box when I moved into my second apartment, replaced by my roommate’s newer model Linksys.
This guy supported 802.11g!
But then the Linksys fried, and I dug out the D-Link again. I continued to use it in two additional apartments thereafter, until I finally forked over $70 for a newer D-Link (although this was after I tried a Netgear, which continually dropped its routing), the DIR-655.
First gigabit-capable hardware I owned
That first D-Link has long-since disappeared, but the 655 still functions on my network to this day, having been reconfigured to operate as a hotspot (300N is still fast enough for an internet connection). My point is that, over the years of router experiences, the only ones that seem to have been built with decent hardware and designed with stable firmware were D-Links. After multiple iterations, I was a brand snob, and currently have 3 of their wireless routers in operation.
But the Internet’s come a long way since the 90s, and while router manufacturers have figured out how to design their equipment to function reliably at a base level, they have not put a premium on security. I suppose that, given the price points of consumer-grade network equipment, the manufacturers have to prioritize, and that priority has fallen upon aesthetic design and marketing rather than support and security. They can’t be blamed for that, since they’re only responding to demand (and the controversial “WAF”). I suppose if customers demanded security, then they would respond accordingly.
My currently-running model: DIR-880L
I’ve listened passively as entire lines of consumer-grade routers were revealed to have massive security holes, and the manufacturers failed to respond. These compromises always affected other brands, but all good things come to an end, and the flaws were gradually revealed throughout D-Link products too. Pity. Now it seems that no brand is immune. All consumer-grade routers have similar problems, and I found myself left without a viable alternative. And while I’m probably unlikely to be targeted, I do have Internet-facing services, like this site (rather that hiding in stealth mode). So, it was time to consider upgrading to a business-class router.
When classifying routers, the target demographic is commonly used in its description. That carries certain connotations, such as the knowledge and motivation of the purchaser, and the level of features and security. Consumer-grade routers are designed to be pretty, work out of the box, and be easily configured if the user wants, but configuration isn’t generally required (or terribly robust). At the other extreme are Enterprise-class routers, which assume a support staff of certified technicians (and an enterprise-level budget, being in the tens of thousands of dollars). Everywhere in between lie Business-class routers, which I find to have the largest range in price and user-friendliness.
I was primarily after something basic–something that maintained firmware updates with vulnerability discoveries, that had good policy-driven default security settings, and still something that I could figure out given my lack of expertise. I decided upon a Ubiquiti Edgerouter X. It operates on their EdgeOS (which is the same across their entire line of products, which means it’s going to get updates as they respond to the needs of their bigger clients), and has received a number of positive recommendations from people in the industry. And at $50, the price was good and low-risk.
Aesthetics be damned (but I still think it’s a cute little box)
It bears mentioning that this is no all-in-one wireless router–not a problem since I have hotspots configured, but be advised.
Amusingly, I lacked a general computer with an Ethernet port. I know that seems odd, but computers are increasingly scaled down to reduce form factor and to extend battery life. And since I haven’t yet built an office, I don’t have a place for a full desktop yet, and therefore stick to laptops. In short, I needed an adapter.
After some searching, I found an Amazon brand adapter:
The reviews checked out, so I ordered that too. I did anticipate some problems getting drivers, since the included CD-ROM was useless as I also lacked a CD drive, but they were available online and after a quick install, things were working as advertised. I needed one of these anyway for other wired LAN configurations, so this project was just the final excuse.
In every consumer-grade router setup I’ve ever experienced, I plug in the router, connect via Ethernet to LAN port 1, navigate to http(s)://192.168.0.1, and am immediately presented with the configuration page login. I followed these same steps, and…nothing. Just an unfriendly browser timeout. I repeated these steps, wondering what I had done wrong. It was not a good sign that I failed at even finding the configuration page. This was not going to be easy.
The instructions assumed a certain degree of competence, of which I apparently did not posses. Fortunately, a kind soul elsewhere on the Internet had written a dummy’s guide for these initial steps (although later, I found these same steps on a quick setup pamphlet in the box, so that was my fault). I had left my computer’s network settings to pull an IP address via DHCP, as is the norm, but the Edgerouter doesn’t come with DHCP enabled by default. Instead, I had to manually assign an IP address to my computer within the normal range of the router’s subnet, which was 192.168.1.0/24 (excluding 192.168.1.0 and 192.168.1.1), so I chose 192.168.1.11 (anything in that range would presumably have worked, but I decided to follow the advice explicitly). 192.168.1.1 was therefore the default address for the router (and different than standard consumer grade routers). I accessed this IP address and was presented with the login. Success!
Already it looks more professional
The default login credentials were, however, in the manual; so at least I was able to log in right away.
Then, I was presented with the main screen:
The screenshot isn’t mine, but it’s more or less what I saw
Uhhhh, what do I do? I spent the next half hour clicking everything to figure out where all the settings were. Router GUIs are always somewhat random, but this one definitely allowed more customization than I was used to. Fortunately, I found a wizard. I generally avoid these, but I had two reasons for using them this time: 1) I wanted to keep the existing configurations on my D-Link, and it’s segmented guest WiFi, so that meant either massively overhauling the setup and possibly buying more equipment, or double NAT-ing; and 2) I didn’t fully understand what I was doing and wanted some more hand-holding. I ran the WAN-LAN setup wizard.
I followed the prompts, the router rebooted, then nothing worked again. Fortunately, I did know enough to switch the Ethernet cable to from eth0, where I had it and which was now configured to be the WAN port, to eth1. Then I re-enabled DHCP on my computer. Success! I logged in.
I connected the modem to eth0, but the router never pulled an IP address from the ISP. Frustrated, I repeated the above steps to no avail. Then I went and fetched the most recent firmware for the device, which was many versions out of date. Ultimately, this wasn’t the problem, but I’m glad it forced me to go pull the security updates before completing all my configurations.
Turns out I just had to reboot the modem. I know I know, what a noob mistake. I put the blame on the new hardware when in fact it’s probably the most advanced piece of network equipment I now owned. I followed the wizard again, slightly changing the defaults so that eth1 and eth2 were separate subnets–a future experiment in network isolation. It’s novel, and seemingly obvious now, that each port on a router be configurable.
So, the modem ran into eth0 (now the WAN), eth2 to the WAN on the old router. Then I had to input all my port-forwarding settings so I could reach the server, and check a setting for NAT reflection, and input my DNS settings, bla bla bla. In short, everything was back online…except for logging into my email server for some reason. I’ll have to figure that out later.
[Edit: I figured out that I needed to add a firewall rule on the server to allow logins from the Edgerouter’s IP address]
The important thing is that it works, and my consumer-grade router is no longer the Internet-facing entry point to my LAN. Presumably, I have a business-class firewall protecting me now.
And an interesting little extra is the DPI feature, screenshot example (again, not my own):
Of course, since I’m double NAT-ing, I don’t see the breakdown per client, but I do see an aggregate of all the network traffic. I don’t know how robust this is, but it sure looks cool.
Liz might call be paranoid, but it’s only paranoia if aluminum foil wasn’t demonstrably effective at blocking alien mind-reading rays (at least business-class foil anyway).
When we bought the house, we had a fence installed. Factors such as the pipeline and the honeysuckle hedgerow prevented a full circumference of the lot, much to our dismay (see any post where I talk about a certain neighbor). But, we at least needed a corral for the whippets, since their potty runs can measure into the quarter-hours.
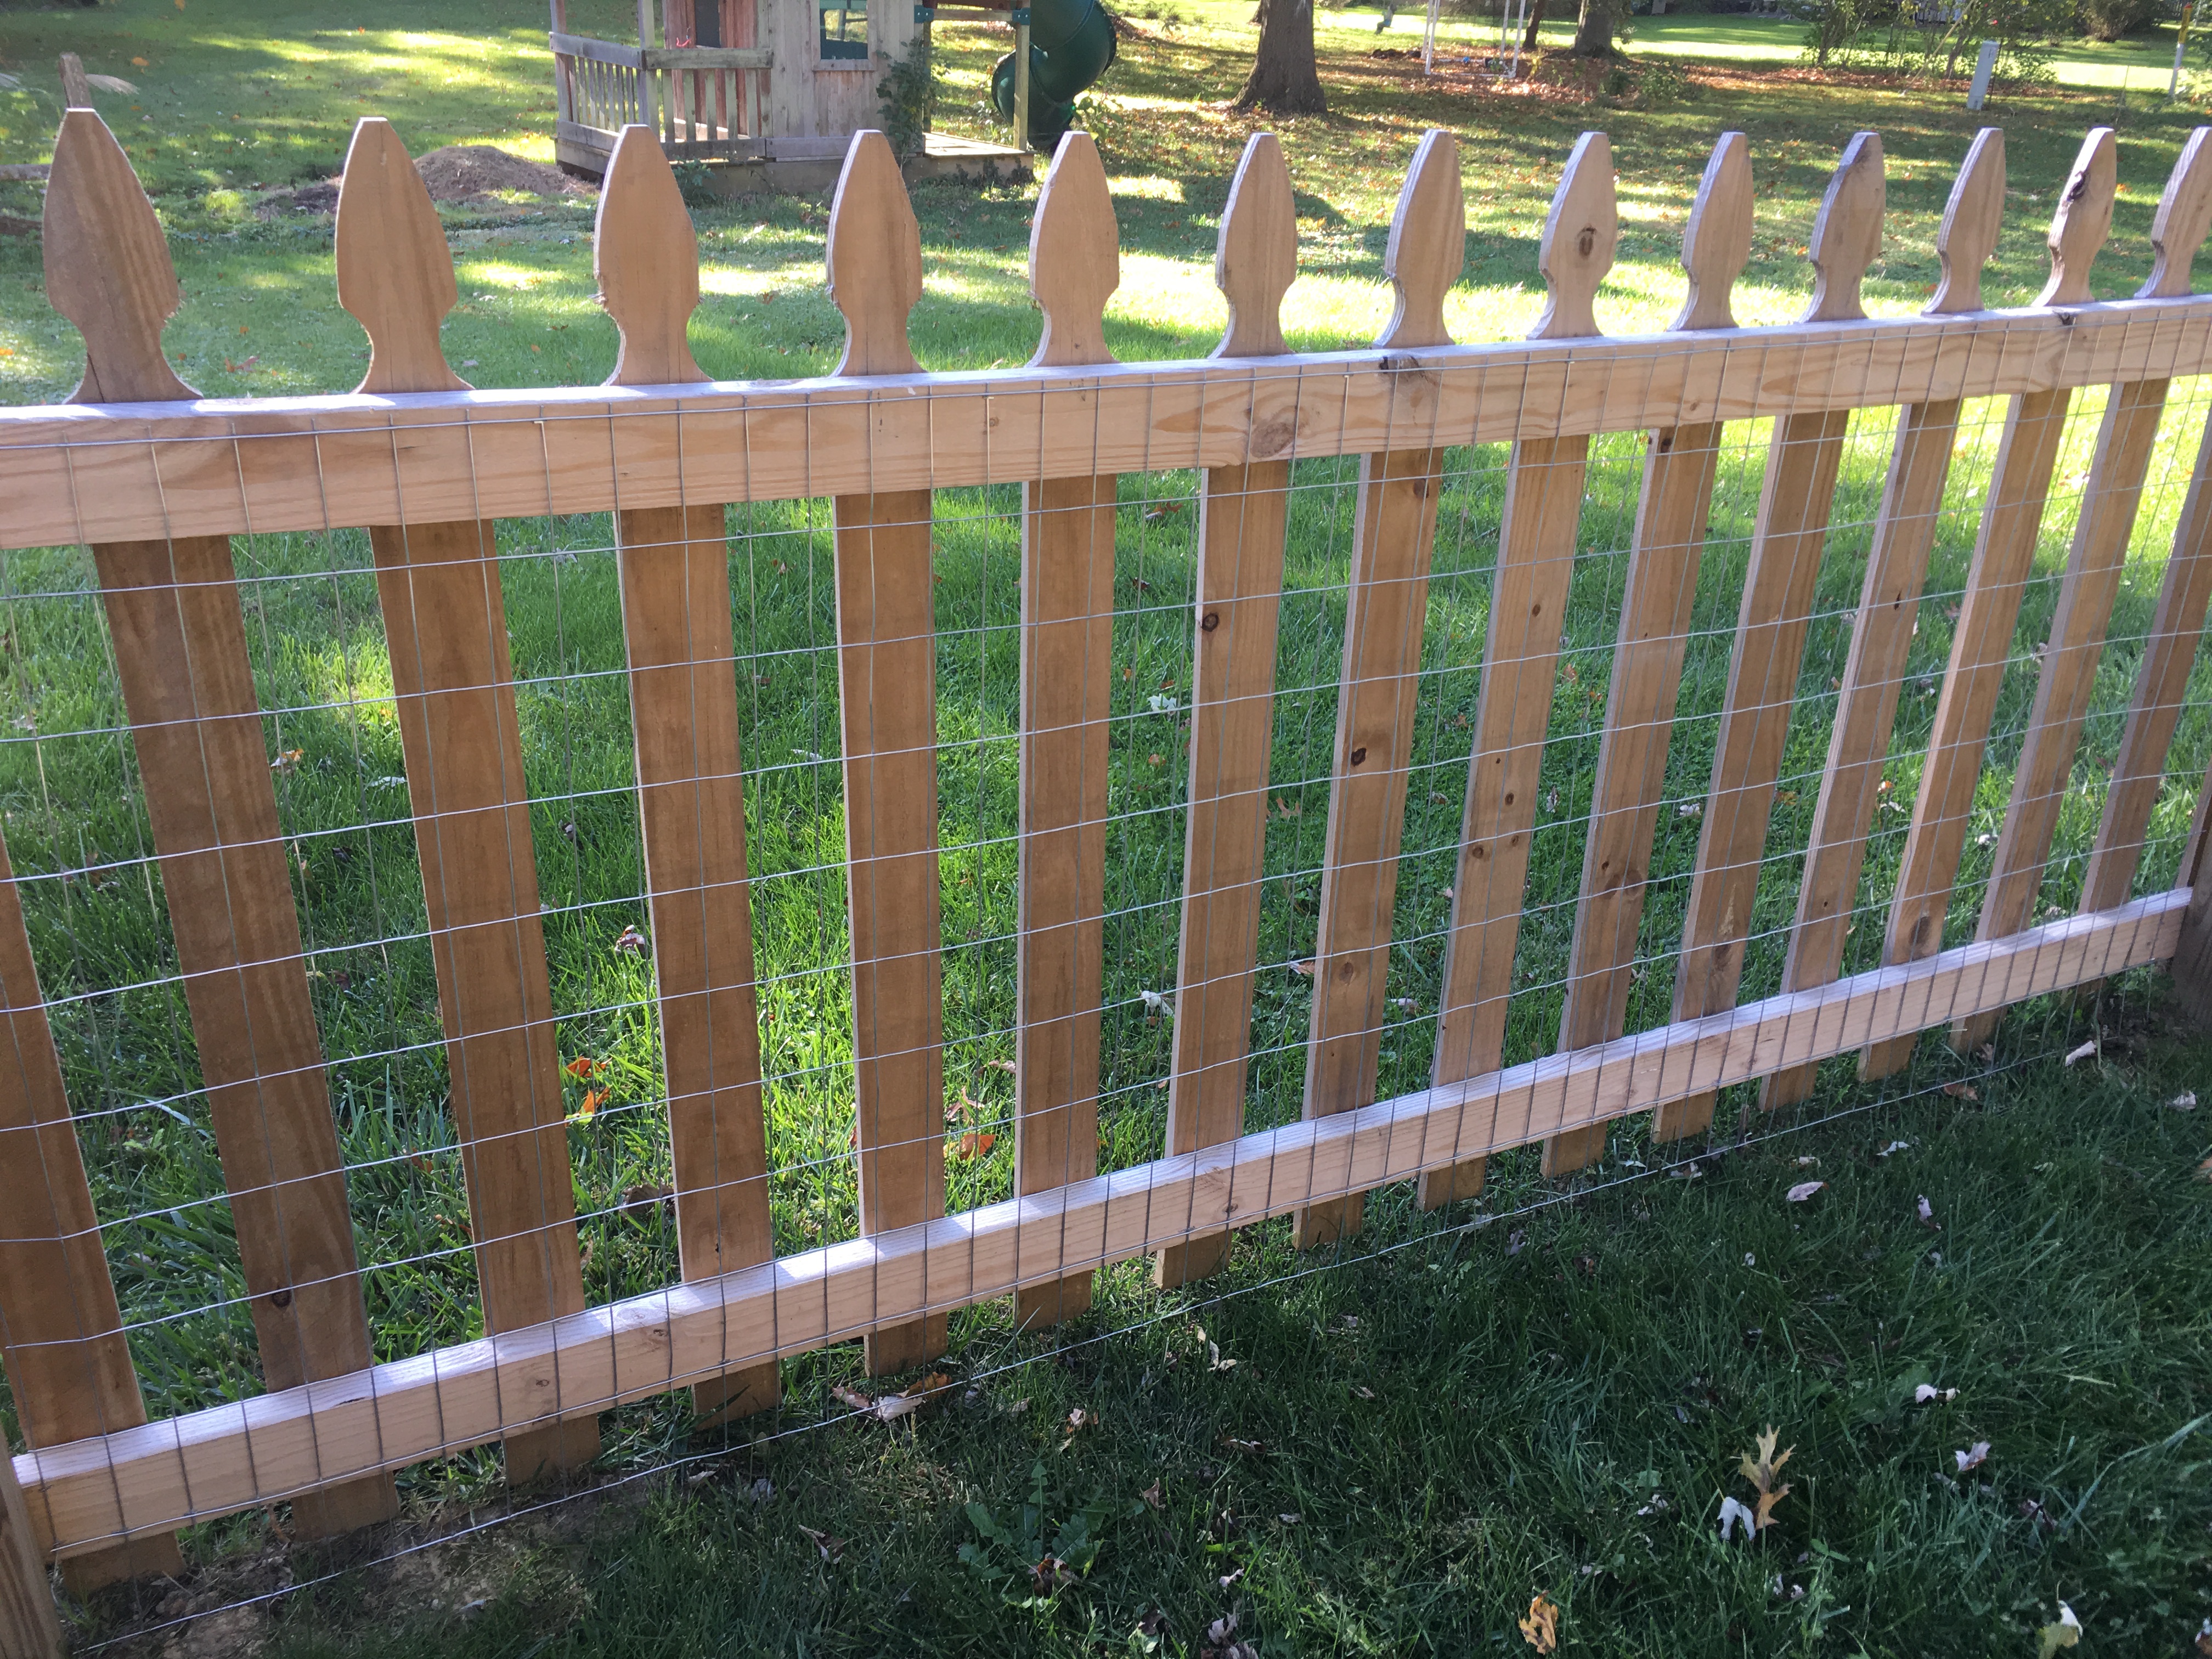
And so, we ended up with a nice little 4-foot gothic picket fence. The quality of the install was, shall we say, mediocre, however; and the railing spacing varied from 4 to 8+ inches. Consequently, the little whippet quickly figured out that the fence was a mere suggestion–a suggestion which became less and less considered throughout the summer months. So when I let her out, she would chase a squirrel, immediately slip through the fence, then when she decided to wander back, mysteriously couldn’t figure out how to slip back in, resulting in me having to go get her.
This culminated in a recent day in which I was working at home, had joined a conference call, then had to let the little whippet out (because she always waits until I’m busy to tell me). I quickly became occupied with work and forgot about her…until The Heckler (The Village Elder’s wife), returned the dog to the front door. True to her name, she then offered select commentary on my negligence, ultimately telling the rest of the village an embellished story about how I was mindlessly engaged with something unimportant and consequently unobservant to the world around me.
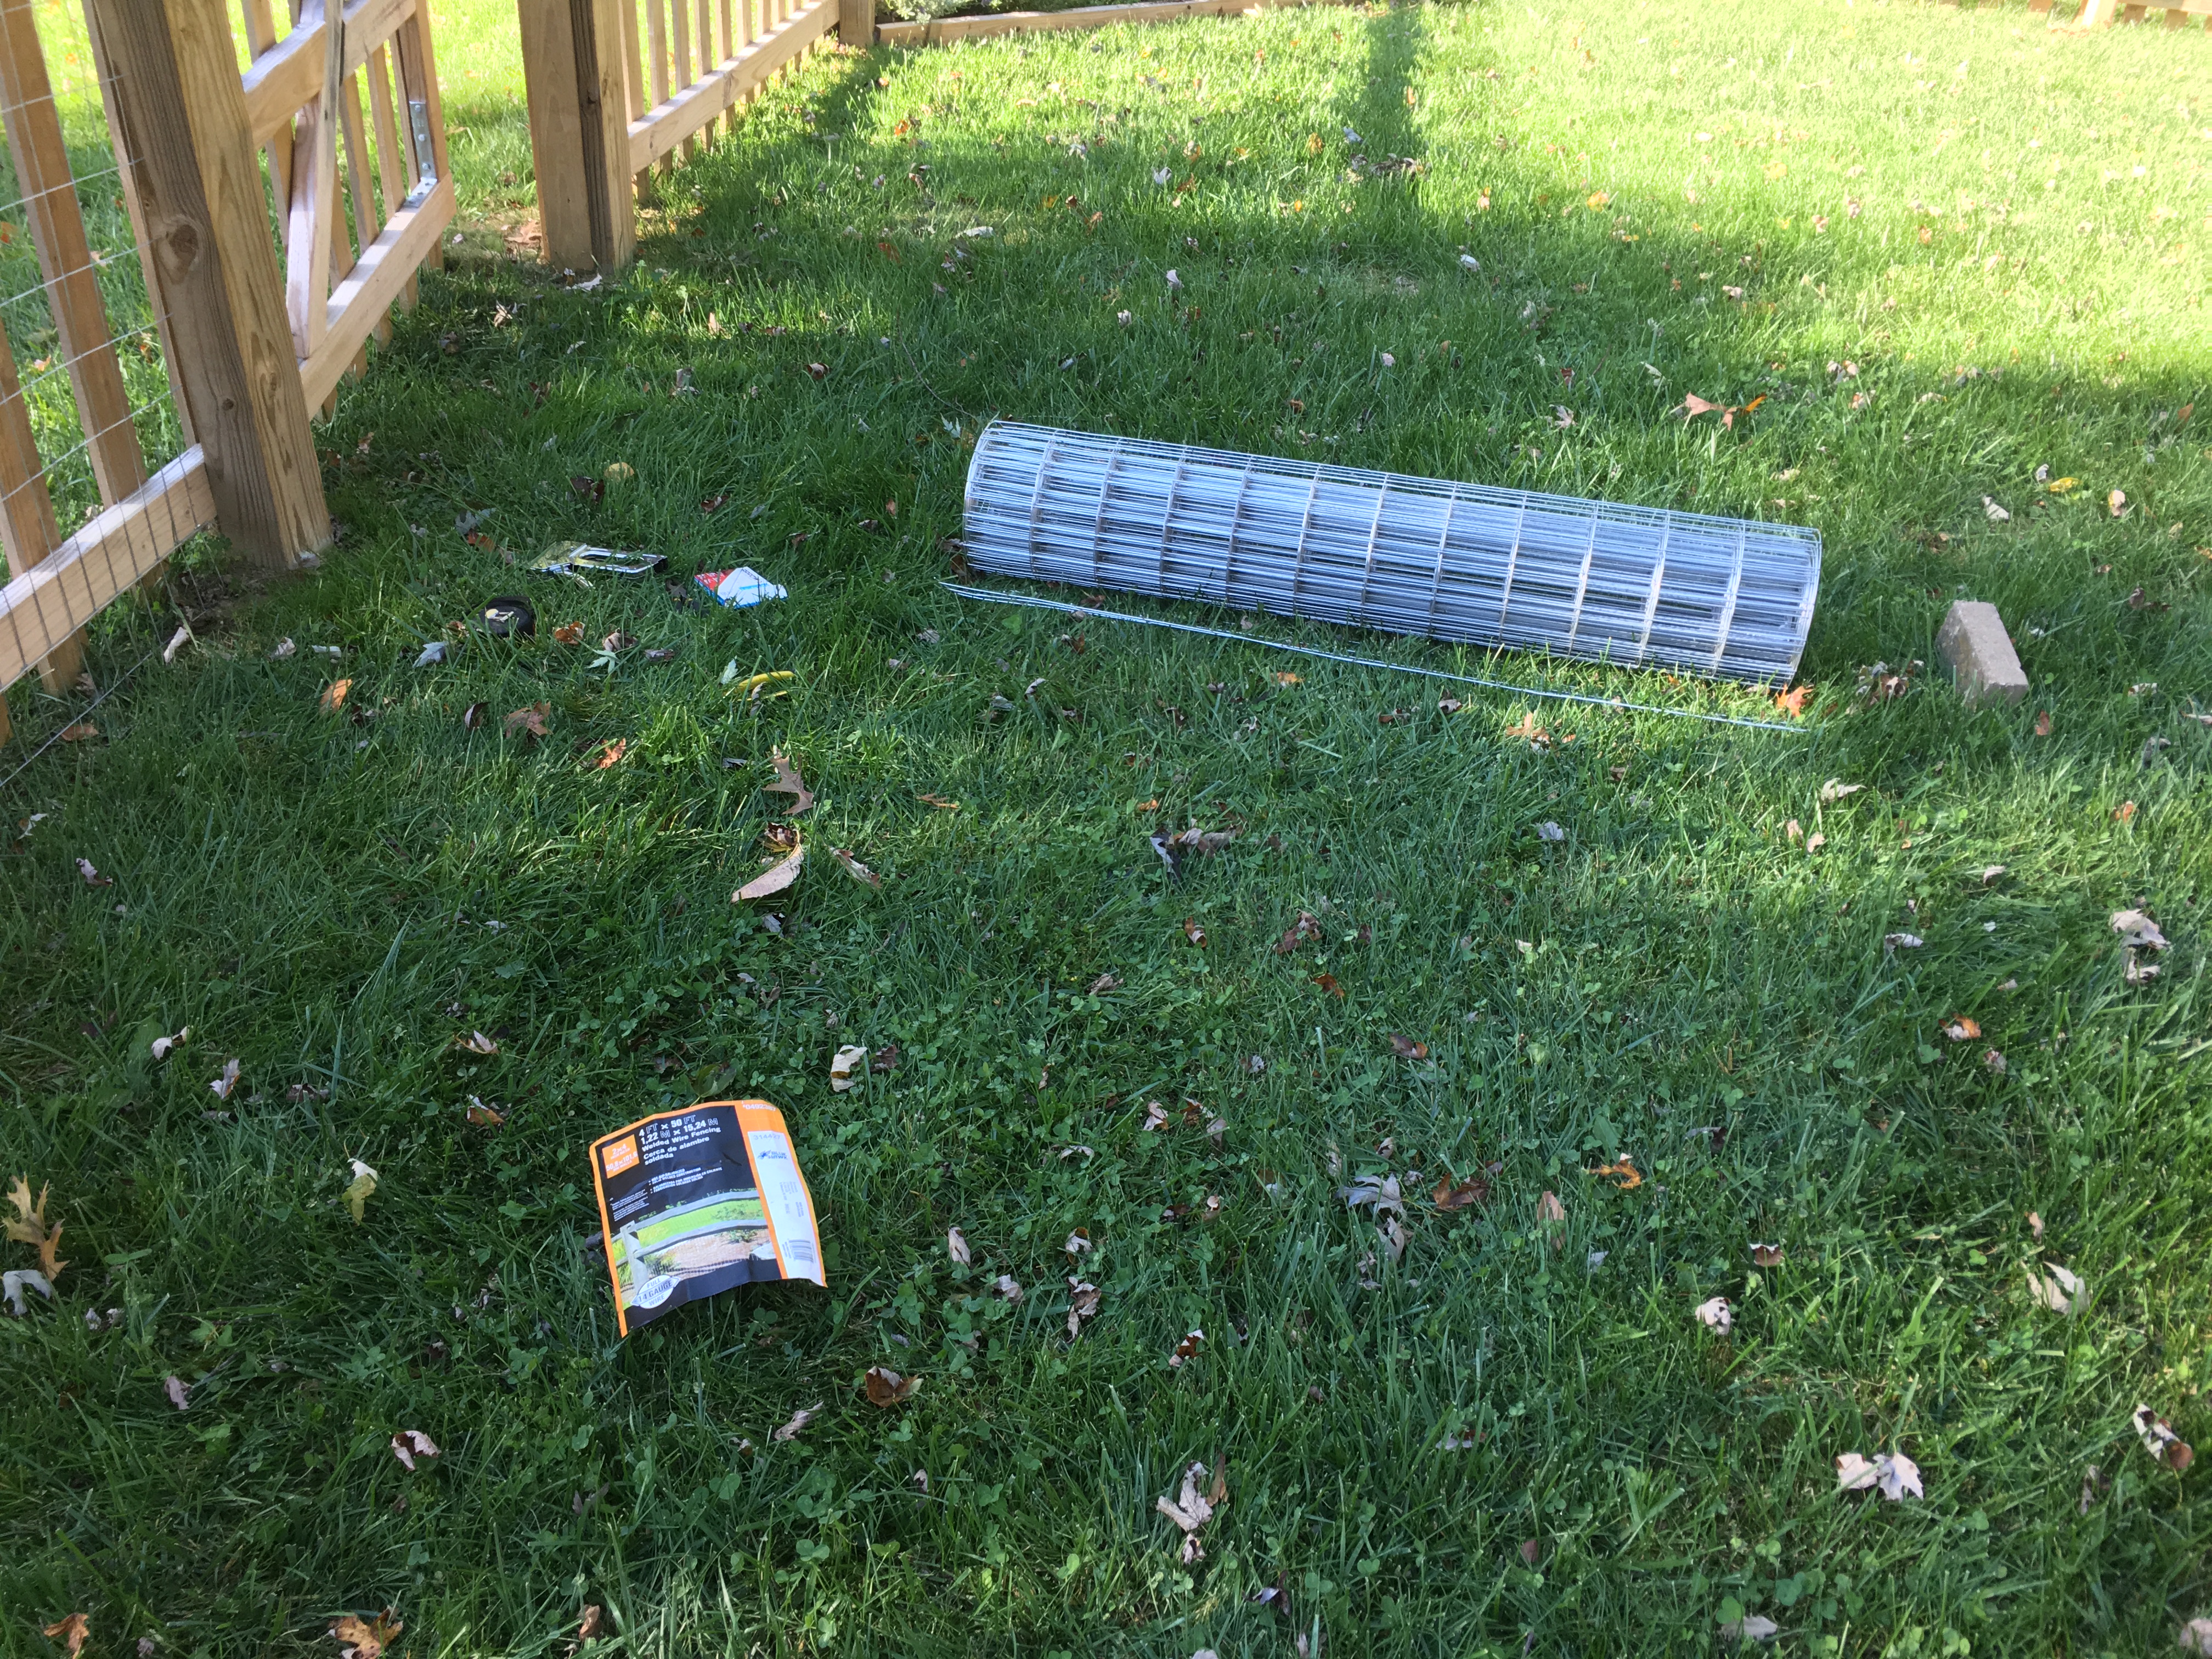
It was the final push I needed to proceed with the project I had already considered: attaching wire to the fence, thereby sealing in any canines wishing to turn feral. Thus, as part of the shop light project, I acquired 150 feet of fencing wire.
Armed with staple gun, wire clips, fencing pliers, gloves, tape measure, and determination; I got to work. Unfortunately, it wasn’t so easy as stretching the wire for the entire run. Since my goal was to also make it aesthetically-pleasing, the wire couldn’t be simply attached to the posts, 4 inches away from the pickets. Nor could the wire be attached to the outside. This meant that I needed cut-to-measure individual segments. And, since the segments weren’t always rectangular, but various forms of parallelograms, I often had to cut to fit while in the process of stapling. In short–it was incredibly time-consuming and physically painful. Between squeezing wire clips and the staple gun, my hands and forearms got a good workout.
I also greatly under-estimated the time required. My 2-hour prediction turned into 6. And it was the last hot day of the year too. But my stubbornness was rewarded and it looks quite nice, or as nice as fencing wire can look anyway.
I feel I need some sheep in there with this setup. And then I wouldn’t have to mow inside the fence! Bonus!
And the best part was when I let the little whippet outside to test it. She quickly returned, and after being let back inside, laid down in her bed and started me down with indignation and betrayal.
As they like to say in Game of Thrones: “The winter is coming.” Or…some damn thing to that effect. I dunno–I don’t watch that show.
But yeah, the winter is indeed coming. I had grown fond of some plants, and those plants are not fond of freezing temperatures. What was I to do? Why, take them inside of course.
Some of these plants will no doubt be fine hibernating in the dark basement. Other plants were never meant to go dormant, or at least I know that they won’t appreciate sitting in a dark basement. But from experience, I know most plants generally appreciate my grow light, or at least begrudgingly accept it, but…there wasn’t room for these large and established plants which I wanted to overwinter. Therefore, this necessitated…a project!
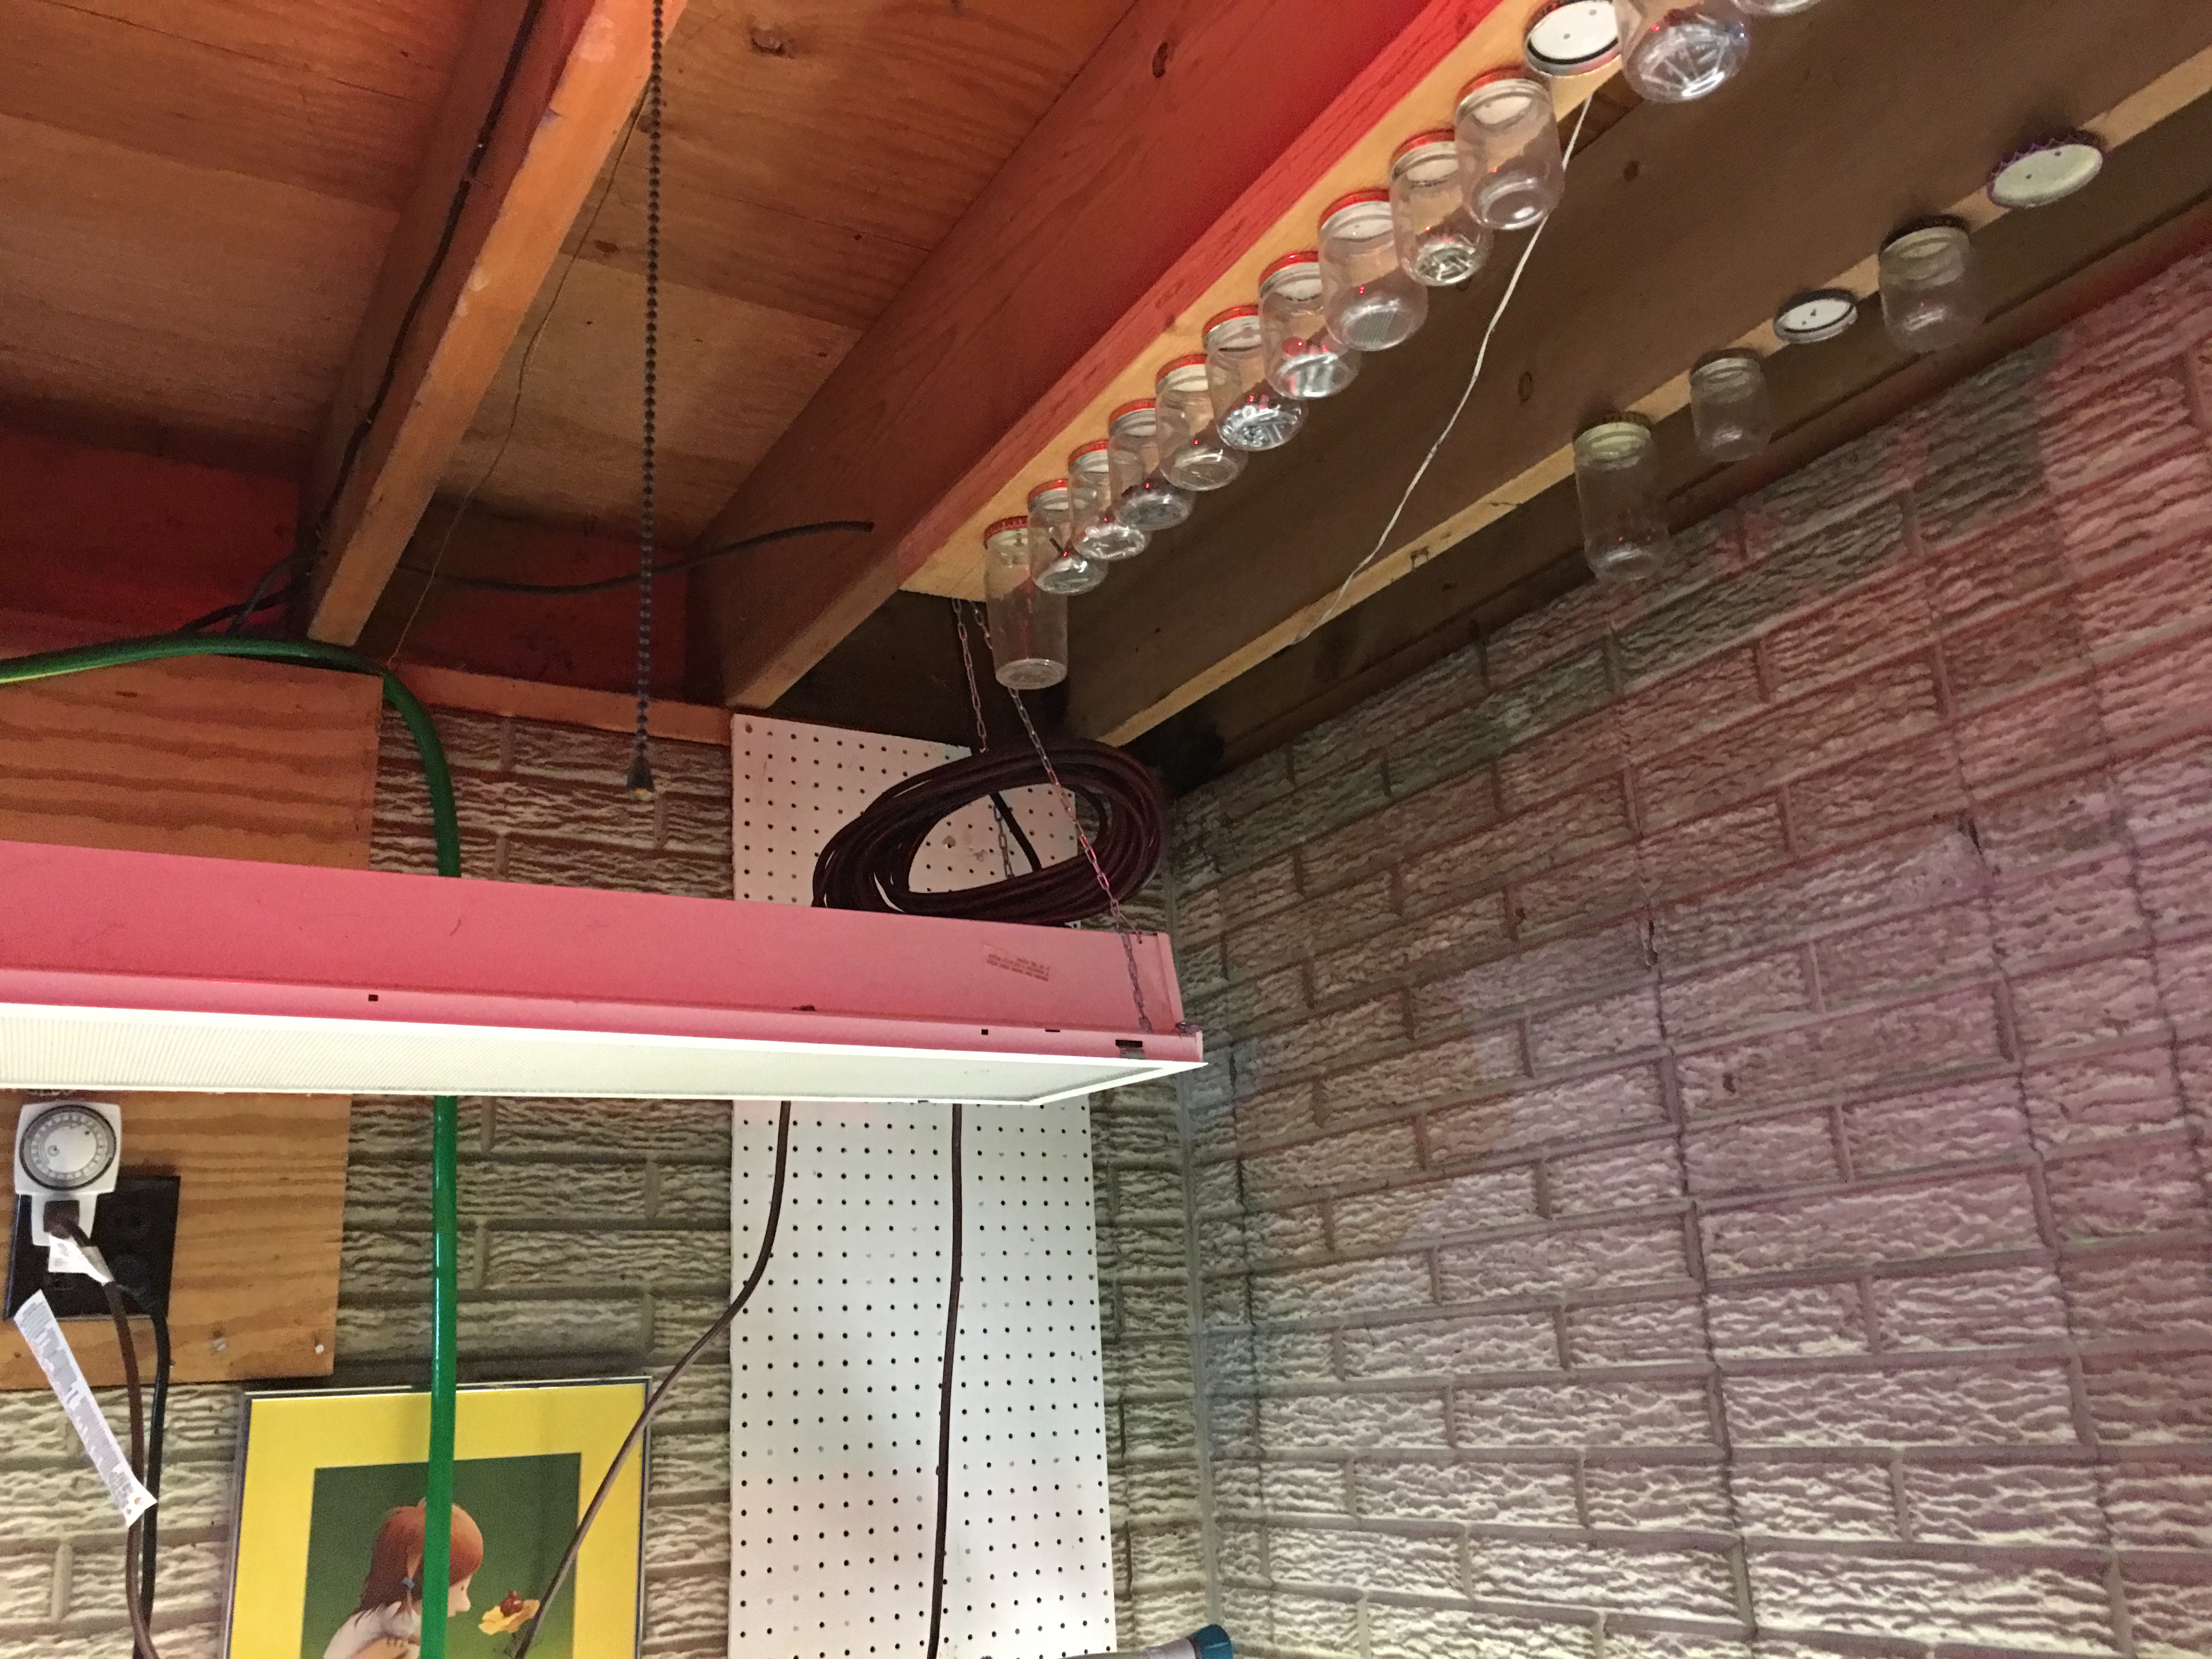
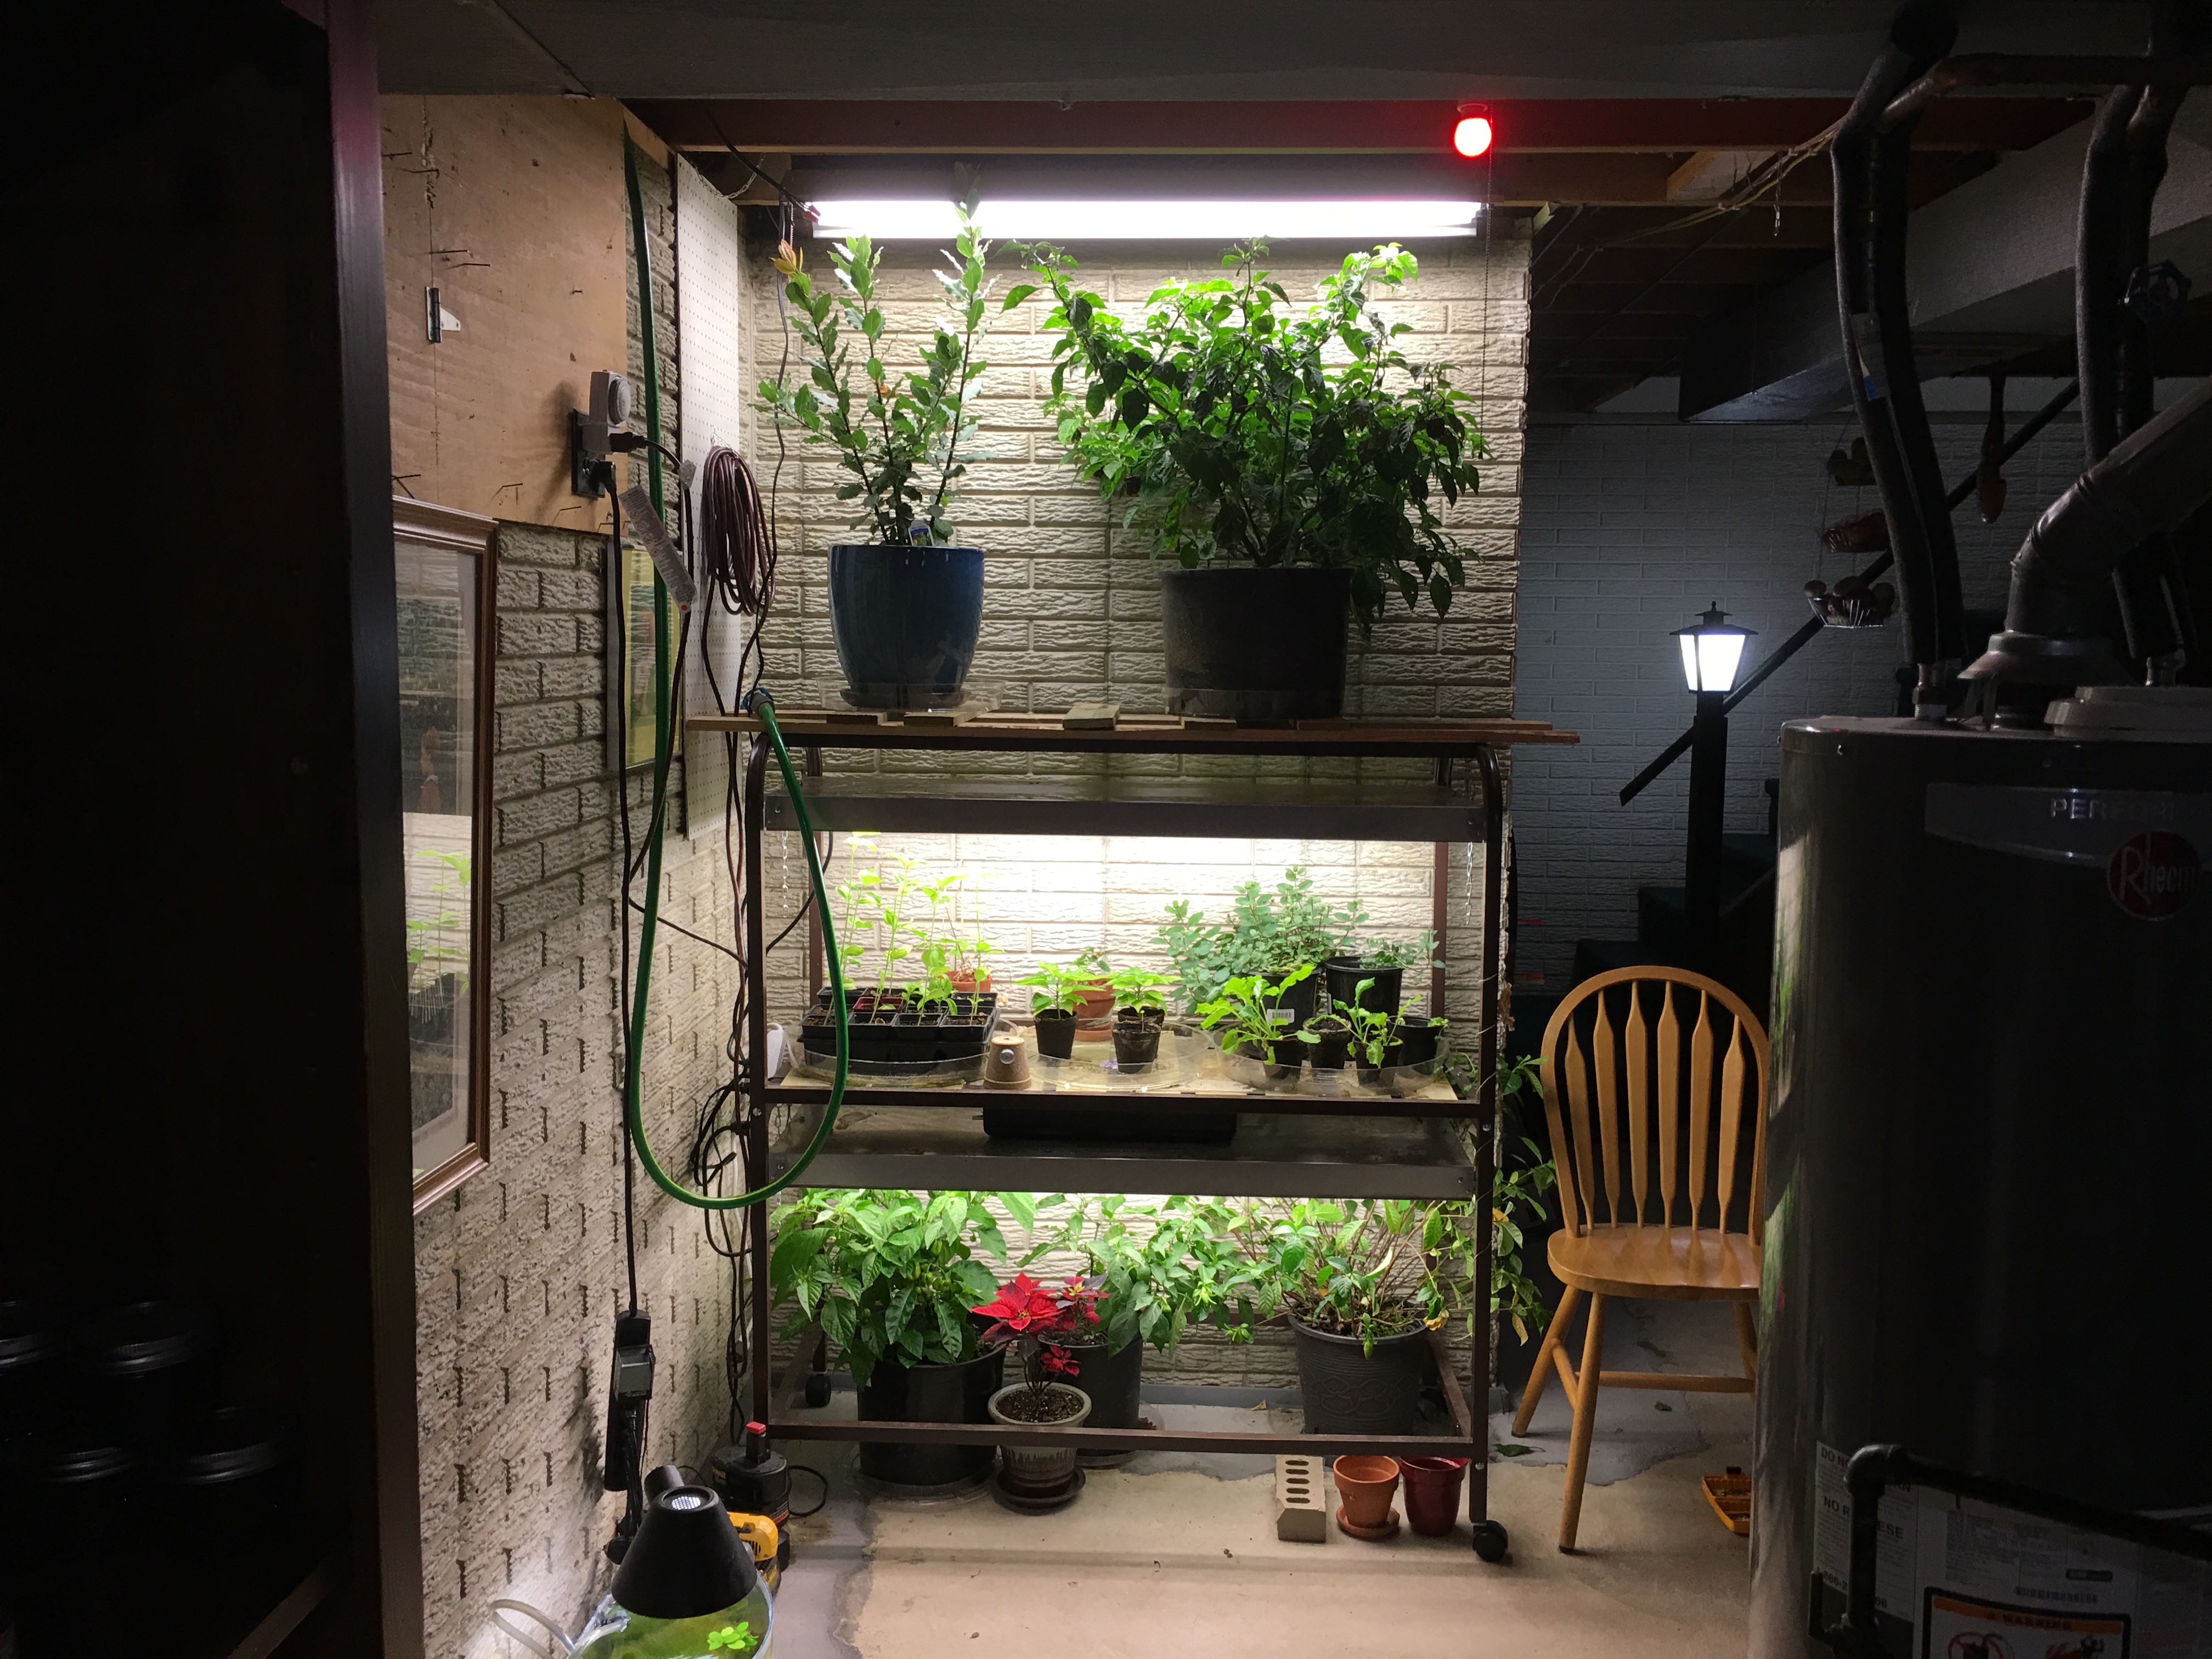
The existing grow light setup has two tiers. But the basement is deep and so there’s more than enough room for an additional tier–a large tier into which I can place tall plants. I would therefore leverage the existing frame and improvise a shelf, then mount a shop light from the ceiling above it. All things considered, it was a conceptually simple project. First though, I had all the former owner’s crap to contend with.
An old trick with which I was familiar–using jars to hold nails, attached by the lids to the ceiling. Or in this case, attached to a 2X4 which was in turn attached to the ceiling. I grabbed a hammer and stood on a chair, intent on prying the board down. I placed a steadying hand on the board, and it immediately detached, scaring the crap out of me as I struggled to keep it from crashing to the concrete floor. I sure was glad that I got around to removing it before it fell on its own. Sheesh.
The existing shop light was ancient and non-functional. It hung from fencing staples pounded into the joists. They should have been pounded in, rather, but instead they were only slightly pounded in. A gentle nudge with a hammer and a staple immediately fell out, causing the deceivingly heavy light to swing and detach the other staple, scaring the crap out of me as I struggled to keep it from crashing to the concrete floor. Attentive readers will notice a theme here, but fortunately for me and my basement, I didn’t need to rip anything else down. Then it was off to my favorite store.
At Lowe’s I grabbed a utility plug, a metal junction box, wire caps, appropriately-rated indoor wire, and a reasonably-priced shop light: $38 for a 4-bulb lamp. My intent was to wire the light so I could plug it into the power strip which served the other grow lights, because the strip was on a plug timer. I smugly reviewed the items I purchased, satisfied with my recently-discovered self-confidence in handyman residential electrical work, then realized the shop light was pre-wired for an outlet and I didn’t need all that other stuff. Almost disappointed at having been saved the trouble, I put it all back.
As I was doing so, an older lady asked me for help in identifying which type of outlet splitter she would need for adding additional plugs to a single outlet. Ah ha! My self-confidence was exuding now. I actually looked like I knew what I was doing! With self-confidence, I confidently identified something that would suit her needs, then strode confidently back to my cart. Confidence!
[I also purchased fencing wire, so there’s a teaser for an exciting future post about fencing!]
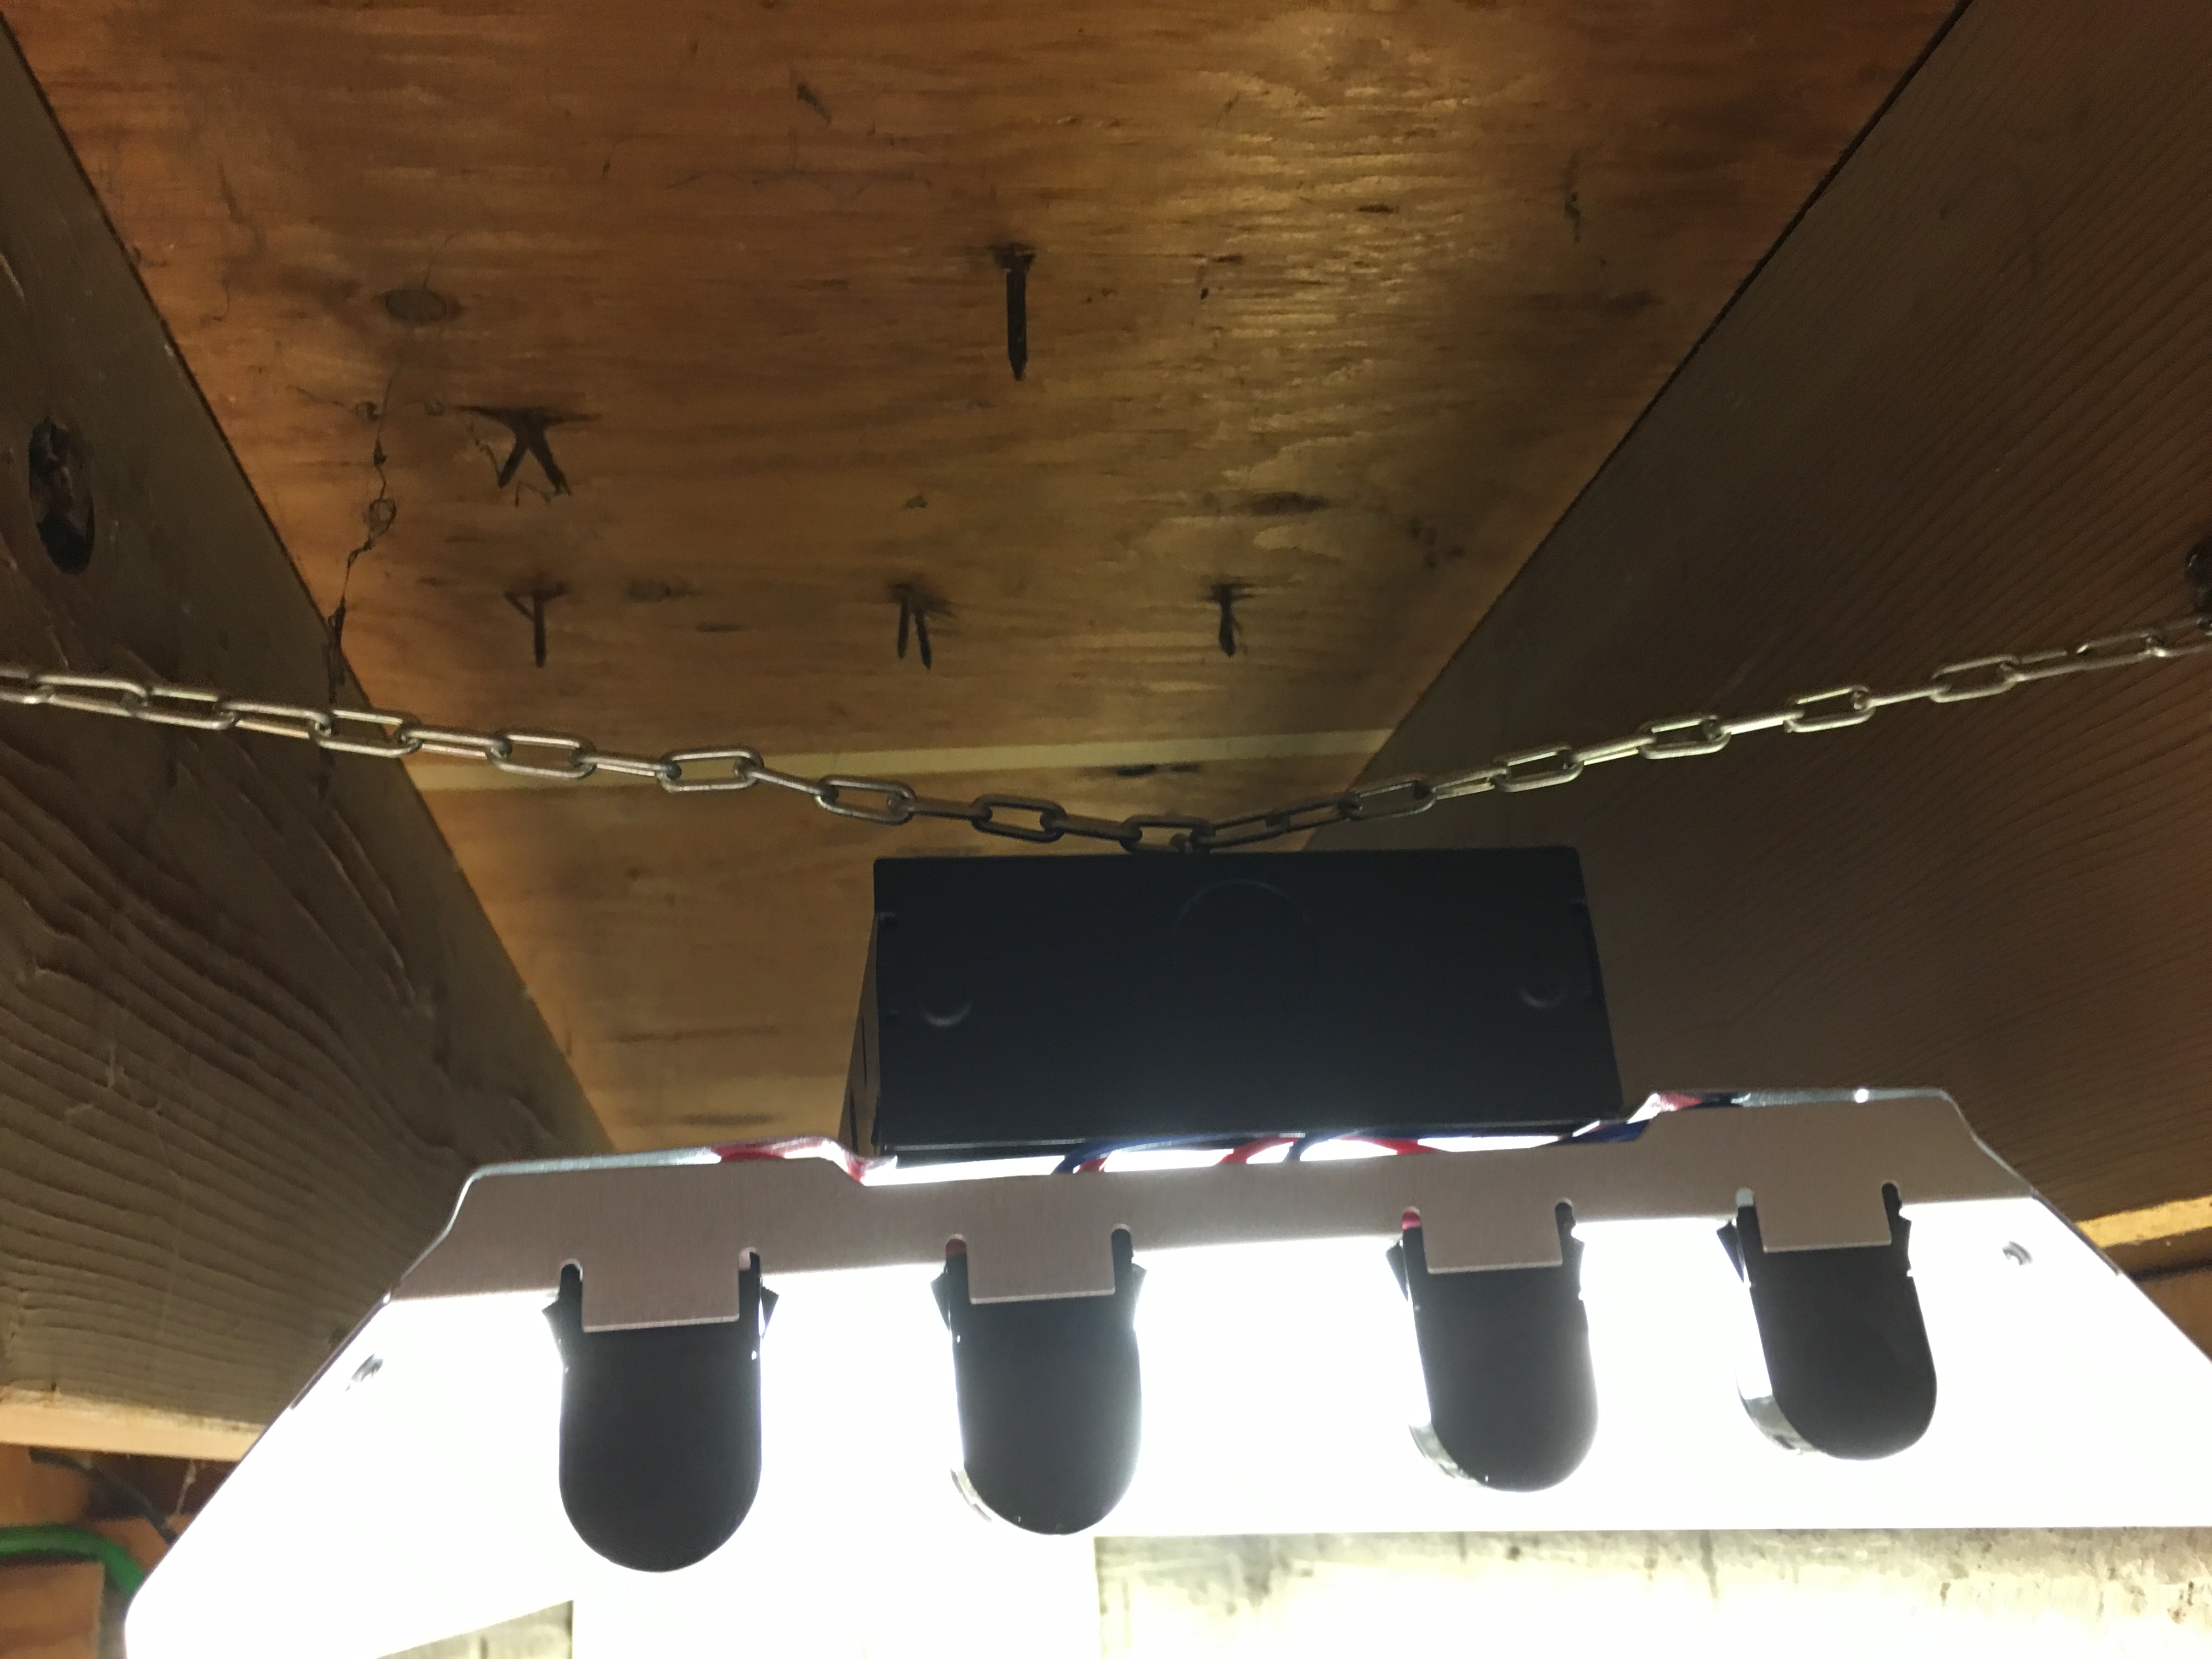
Back home, I strung recycled chain from the old shop light between joists. My intent was to hang the new light between the joists, thus maximizing head space. I also properly secured it with wood screws–something a little more confidence-inspiring than staples.
It was only when I brought plants downstairs that I considered in earnest their weight, and the fact that the aluminum frame was not designed to bear it from above. I searched in vain for a load limit, then decided to simply reinforce the cross beams with boards. The arches felt very robust, and I didn’t think they’d collapse. If it starts to show signs of strain then I’ll have to build something else, but I think it’ll hold.
That’s the chocolate habanero and bay plant up there
I later placed a standing fan next to the setup. Hopefully, I’ll be able to overwinter these. I enjoy being able to garden year-round.
It’s also really hard to search for articles on indoor gardening without being redirected to questionable sites, like “bigdanthestoner.com” or “iliketosmokeatonofweed.net”. I supposed if the DEA shows up, I’ll have a funny story to write about.
During my recent plumbing project, I considered that connecting pipes, if done wrong, at least wouldn’t kill me. Still, I found the process irritating, and after the pain of cinching down threaded pipe connections took its toll on my elbows, I concluded that I would much rather be doing electrical work. Besides which, if I wear leather gloves, the shock of 120 volts is reduced to a mere tingle even if I screw up the breaker.
Still, despite this mitigated lethality, when I find something done wrong, I grow concerned. So it was that I decided to tackle the unattached electrical outlet in the garage. I really should remember to take before pictures, but I didn’t this time, so I’ll have to explain the setup.
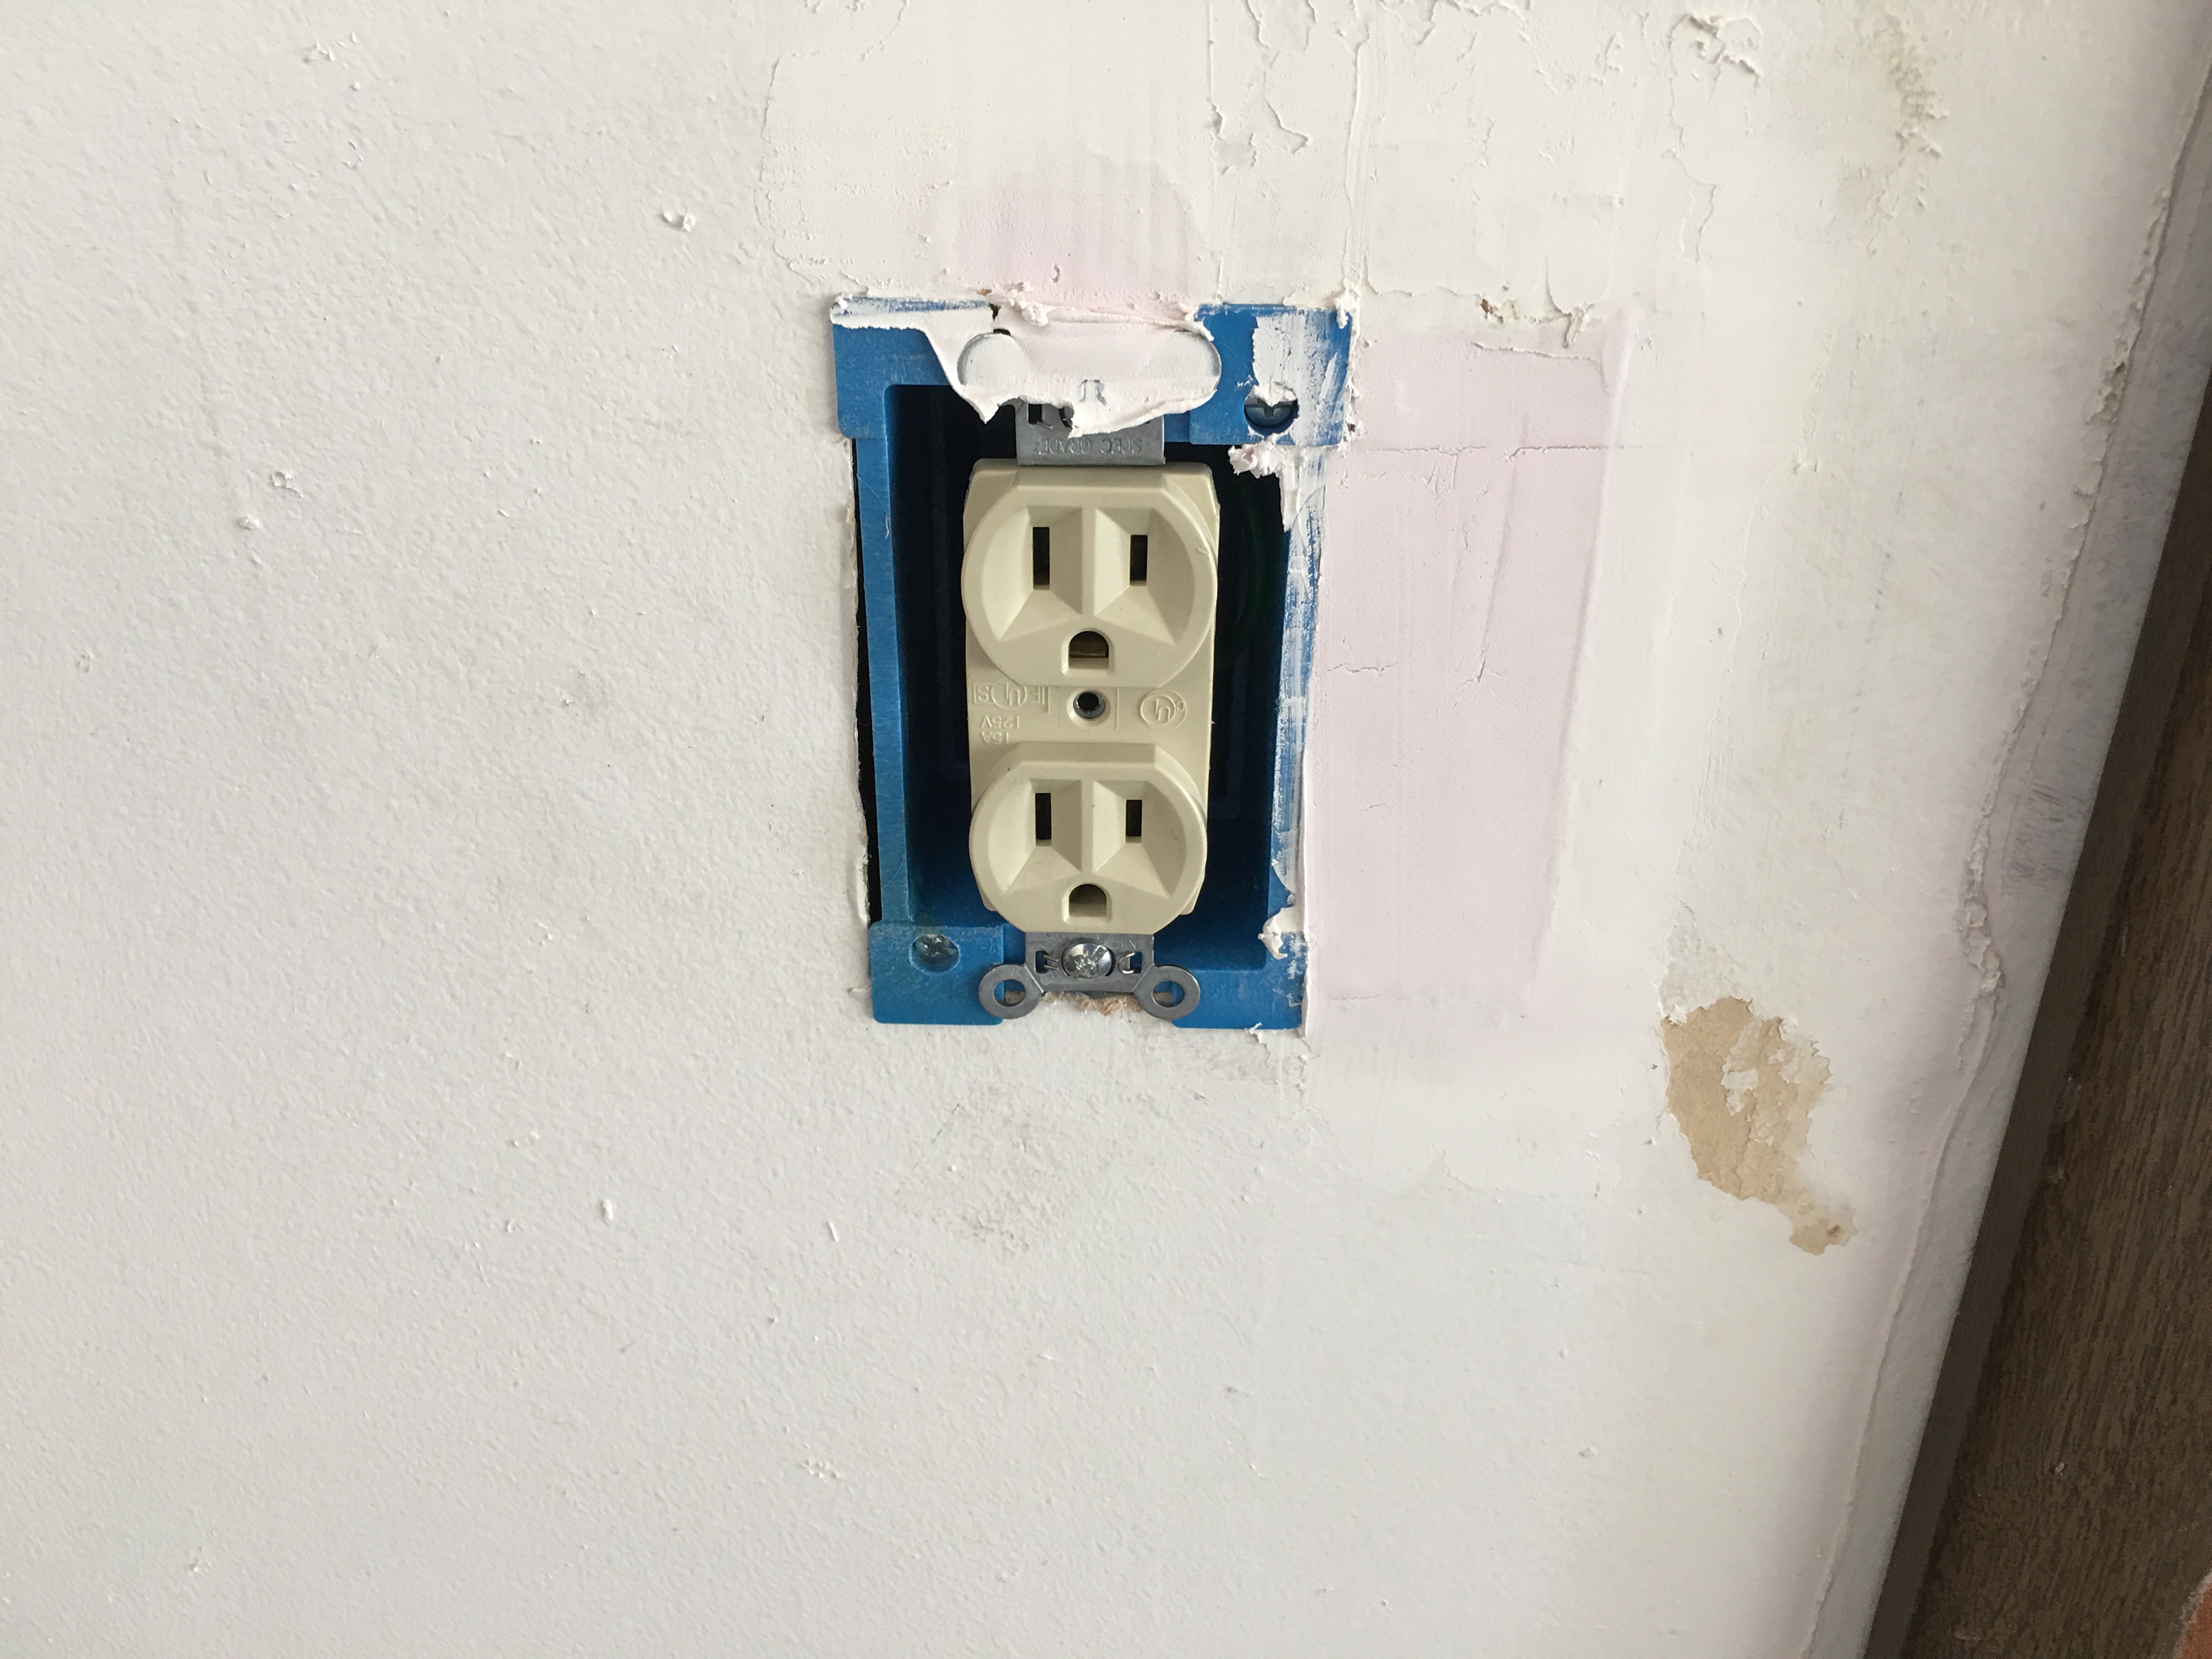
First, I’ll mention that it was a 2-pronged ungrounded outlet. That was part of the problem, as an obviously bad choice for the garage, which would presumably be more likely to power higher-amperage devices. More troubling was that the outlet wasn’t bolted into the wall box, and the wall box itself wasn’t even attached to either the adjacent stud nor the drywall. In short, there was an electrical line leading into a loose box, then wired into an ungrounded and unattached outlet–a hole in the wall with exposed hot wires. What could possibly go wrong?
My main concern was that the kid might poke a finger in there, so I had taped up the cover. And as the outlet lacked a ground, as mentioned, it was of limited use anyway. But then, as I was shoving rolls of carpet into the attic one day, I considered: how hard would it be to run a separate ground to that outlet and make it serviceable again? The basement has a ground line running through the joists, so perhaps the attic had one too. I searched around, but no ground wire was to be found. That seemed odd, seeing as this was the only outlet in the house which didn’t have a ground. For a moment, I panicked, thinking that none of the outlets were grounded, but these fears were quieted when I opened a junction box and discovered that all the wiring was modern Romex with connected grounds.
I followed the wire from the box to the obvious spot where it dropped down and fed the outlet in question. This wire, too, was grounded, which begged the question: Why wasn’t the outlet grounded? And where was the ground wire?
Climbing down, I checked the outlet box again. Turns out that the wire did indeed have a ground, but it had been clipped off at the point where the outer insulation had been stripped to separate the wires. So someone had deliberately installed an ungrounded outlet on a grounded line, and had removed the ground. Why? Tugging on the line, I discovered there was no extra wire, so I couldn’t simply connect the ground to a new outlet as-is. And of course, the box wasn’t mounted so I’d need one that would. Sigh.
My motivation to complete this project coincided with Liz re-painting the living room. With my entertainment center out of action, and the threat of being drawn into a painting project looming, I concluded that this electrical problem needed an immediate resolution. Off to Lowe’s!
In the electrical isle, I wondered why both metal and plastic boxes were the norm. Why would one be used over the other? Maybe metal was for industrial buildings. But for me, I rather preferred to use non-conductive material to house electrical wires. I also bought a roll of 14 AWG wire to extend the ground.
Back at home, I followed the usual procedure of sequentially flipping breakers until the correct (and least logical) circuit was found. Then I got to work removing the unmounted box, which wouldn’t fit through the outlet’s hole in the drywall. I wonder how it got in there to begin with. Was it installed before the drywall, but never mounted? The prior owner had done some weird electrical projects in the basement, none of which inspire much confidence, so this could very well be one of them.
At least it was the garage, and the drywall isn’t painted out there, so I didn’t feel much hesitation in sawing through it. I removed the useless metal box and installed the plastic one, having poked the wires through and extended the ground. The outlets in this house are worn out, so I’ve been replacing them as demand necessitates. This is the 5th such outlet to need replacing, so I have a supply of them on hand.
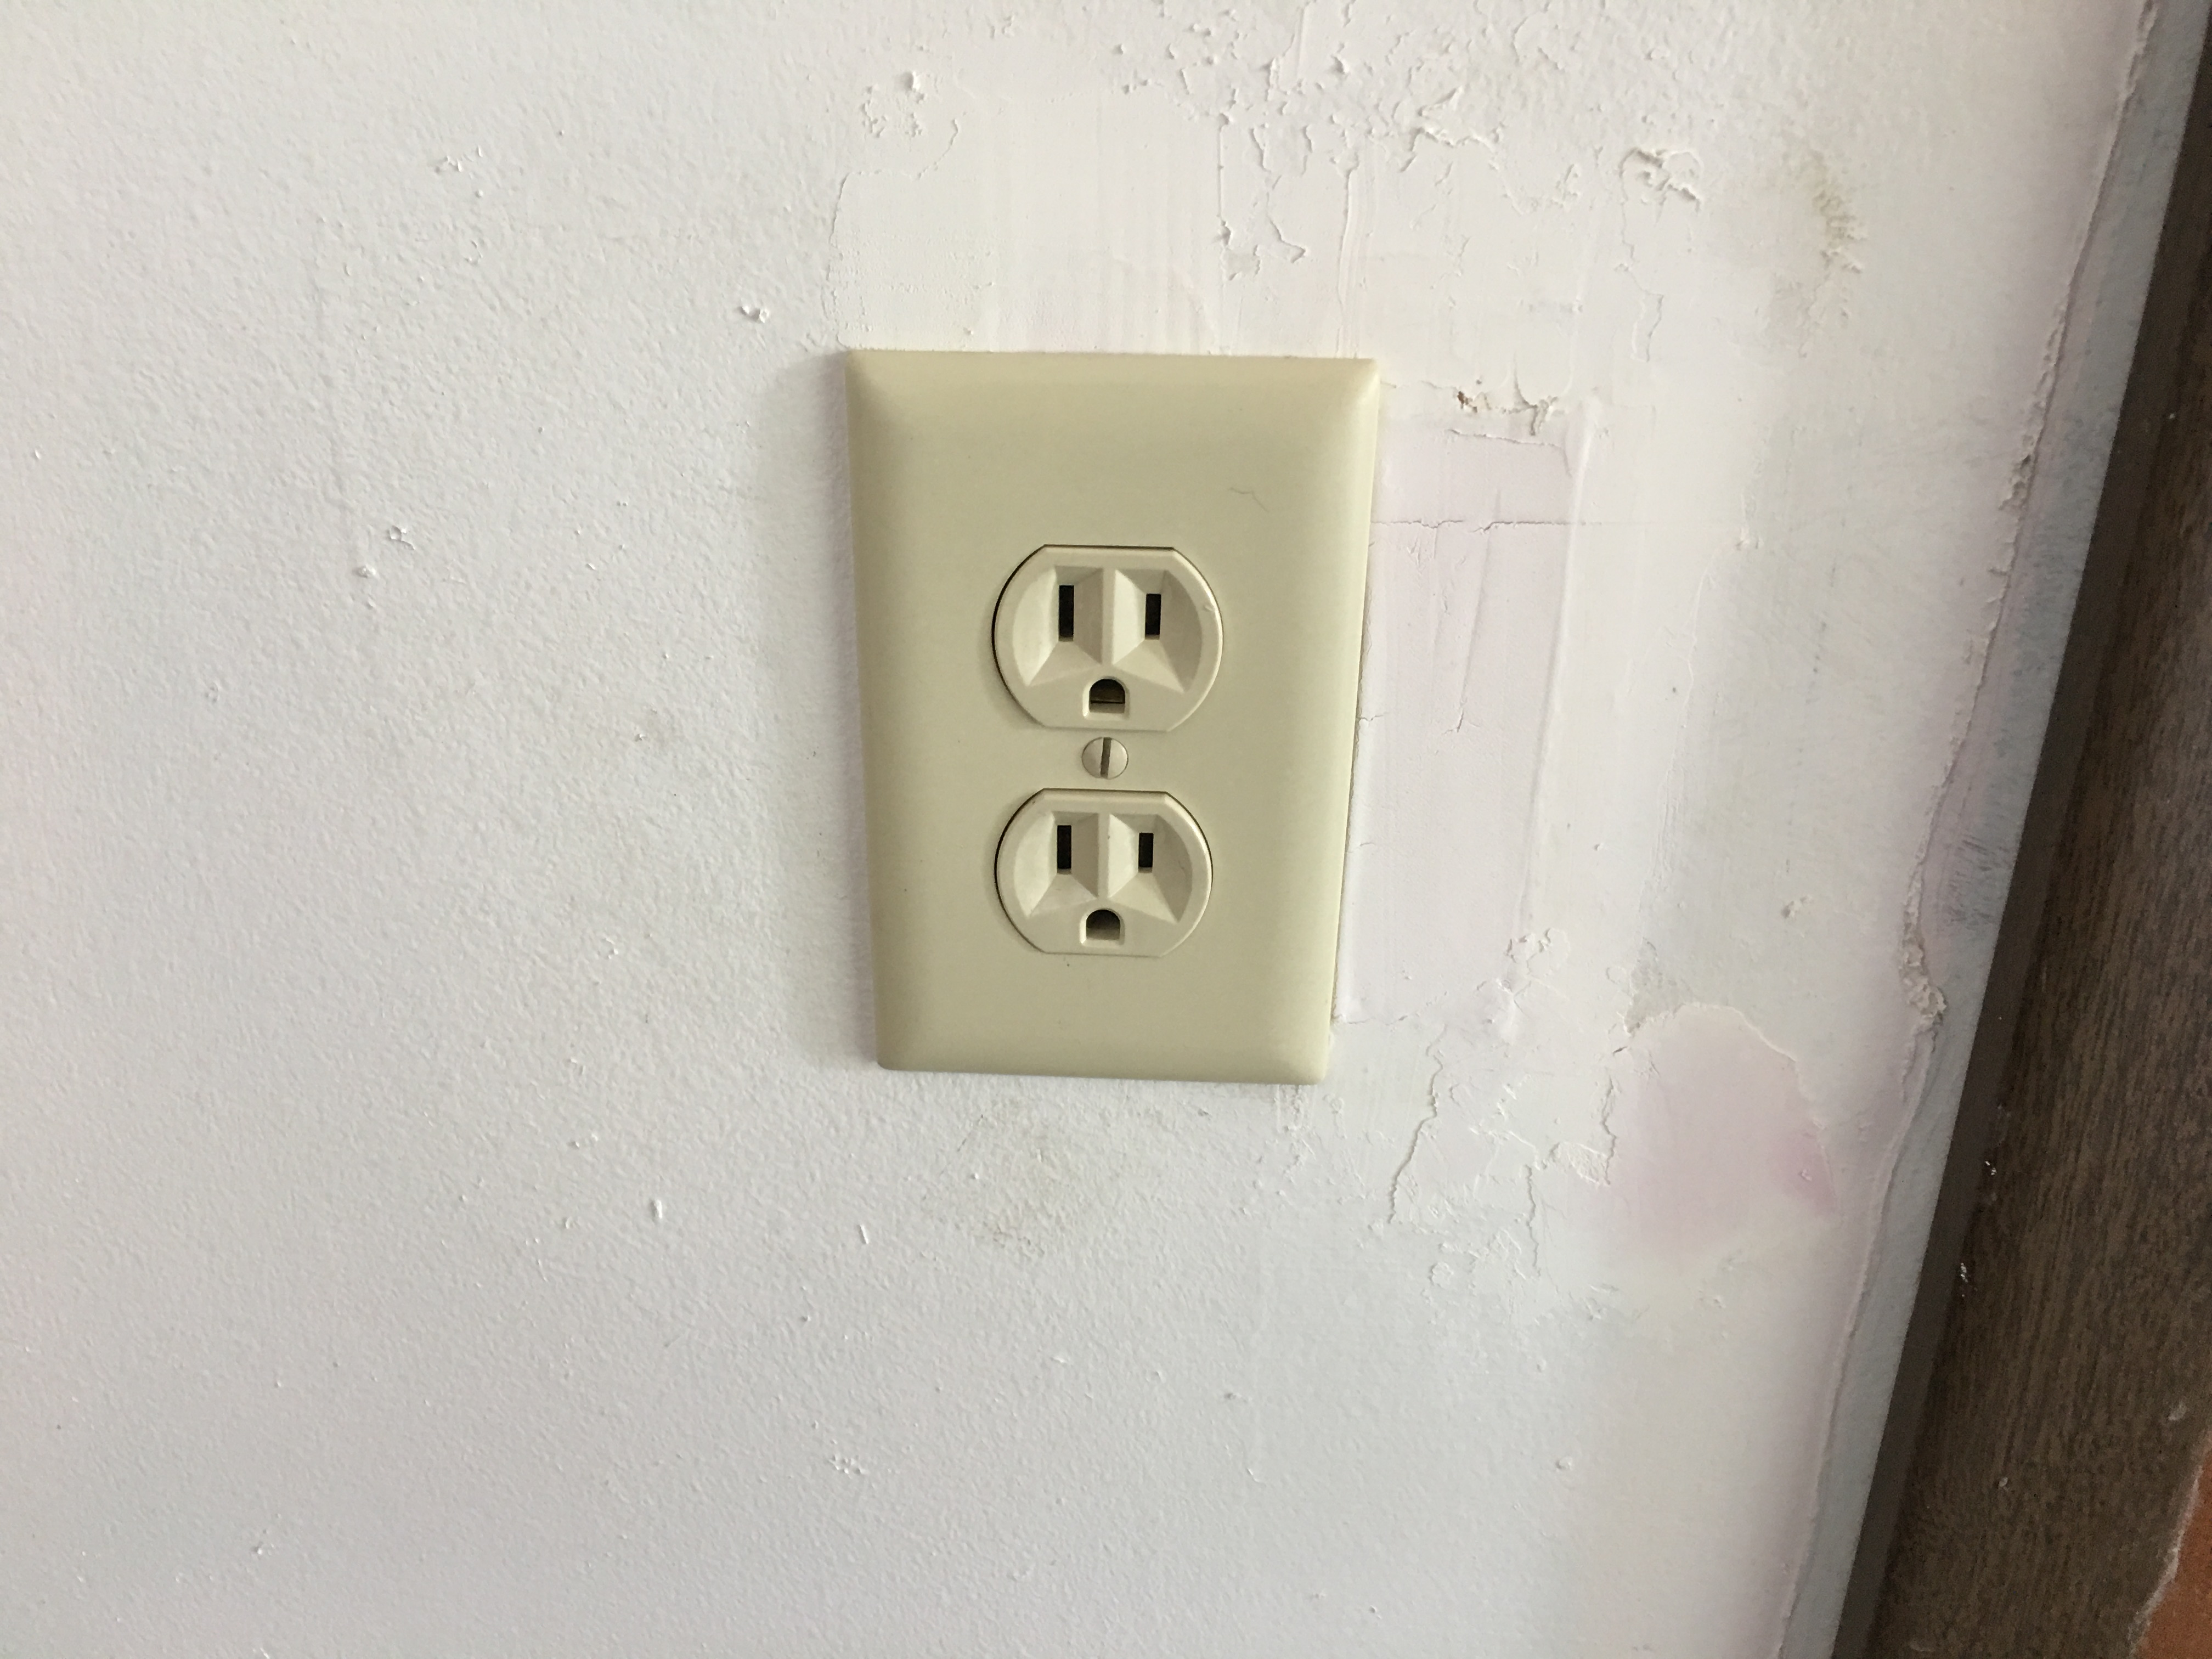
I patched the hole with leftover drywall and spackle. It doesn’t look very clean, but it works and is far safer than the prior potential disaster.
What the hell was wrong with this guy? You’d think that electrical work is something worth doing right the first time.
Fortunately, my project was finished quick enough that I was able to help out with the painting after all…lucky me.