A man should have weapons mounted on walls. This is a requirement of manhood. Failure to do so denies that which makes us men: the capacity for and proper use of selective violence.
However, the type of weapon and the method of display distinctly broadcasts the man’s association with violence. Sword = nerd and probably younger. Yes, I have a sword hanging up in the basement but I also have a history degree so I get a pass. Old family shotgun = appreciation for family history. Bolt-action rifle = appreciation for hunting or precision shooting. AR15 = douchebag.
But what about classic recurve/longbows? Well they’re awesome, of course. But as for storage, the bow is a unique customer. It can’t be stood up in a corner or shoved in the attic. Bad climate control can cause delamination, and improper support can cause warping. Unlike firearms, they’re very particular. Even when not intended to be displayed, they still need even, horizontal support in a low-humidity and low heat environment. And at 4-6′ long, they can take up an awkward amount of wall space. A solution was needed, but internet searches for bow holders tended to favor the compound variety, and anything else proved to be ridiculously overpriced. As usual, I would have to build my own.
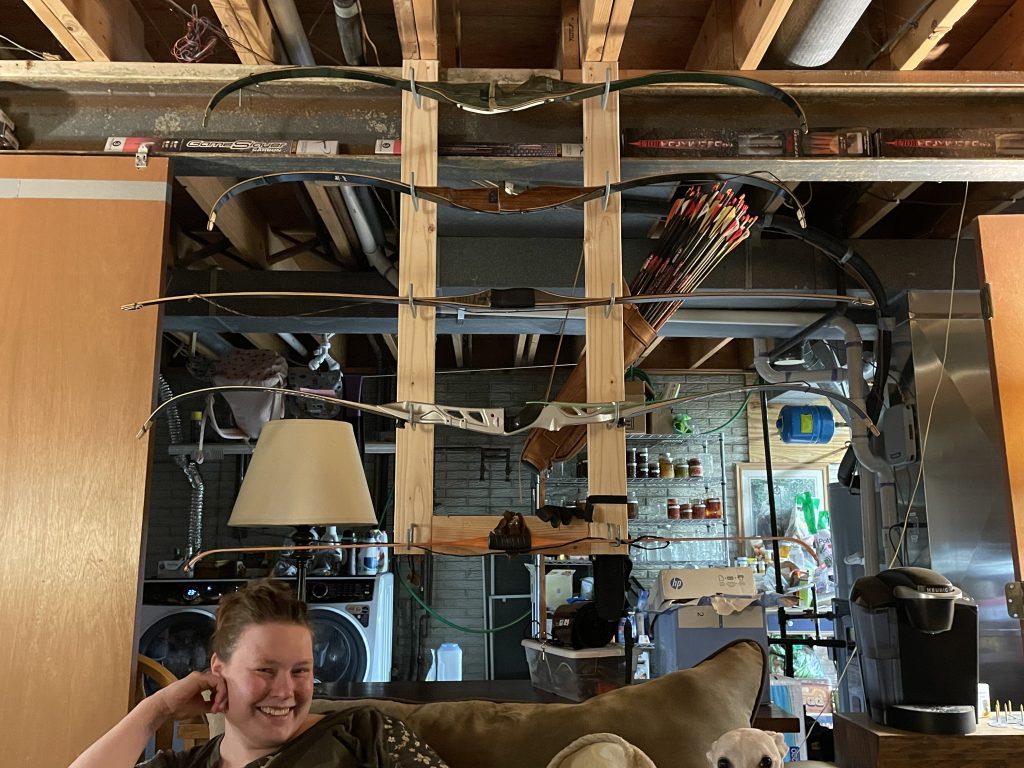
…Which really didn’t require all that much imagination. A couple boards and hanging brackets would suffice, since they were going in the basement. Here’s what I came up with:
Complete with pretty wife
Basic and functional, and elegant in its simplicity. At last the bows are now not only properly stored, but also displayed. Manly!
Feminists often don’t acknowledge the exploitation of men. The assumption that men have always possessed personal agency is in direct opposition to most of our history. Most men did not get to choose their social status or career options. Most men were expected to conform to predefined values and obligations – same as women. I’d even go so far as to suggest that the rift in egalitarianism was fairly recent. When modern western society shifted towards one of individual autonomy, women were excluded – a social problem which has, on paper anyway, since been addressed.
Of course, what’s written and what’s practiced are two different things. And while legal obligations such as, say, equal opportunity in the workforce be enforced – which are dependent upon everyone playing by the rules, shouldn’t so too certain social obligations be governed? A woman is judged by her domestic competence. And men are judged by their physical abilities and willingness to suffer physical injury. Why don’t we as a people change these?
Because they supersede civil law. They long predate civilization. They remain the foundation to our survival as a species in those early days, which paved the way for common law, prior to civil law. I don’t think they can ever be changed. They’re part of who we are.
Point being: as a man who lacks economic and political means, I’m trapped in an exploitative system too.
So it was that 10 years ago I willingly agreed to be the functional mass of man flesh required to maintain an estate…for 10 years. My premonition at the time was that age and injury would compound to ultimately end my usefulness as a man after that timeframe. Such a prediction has turned out to be surprisingly accurate. I’m gradually phasing into a period of needing more hired help, and becoming incapable of tasks which formerly were straightforward.
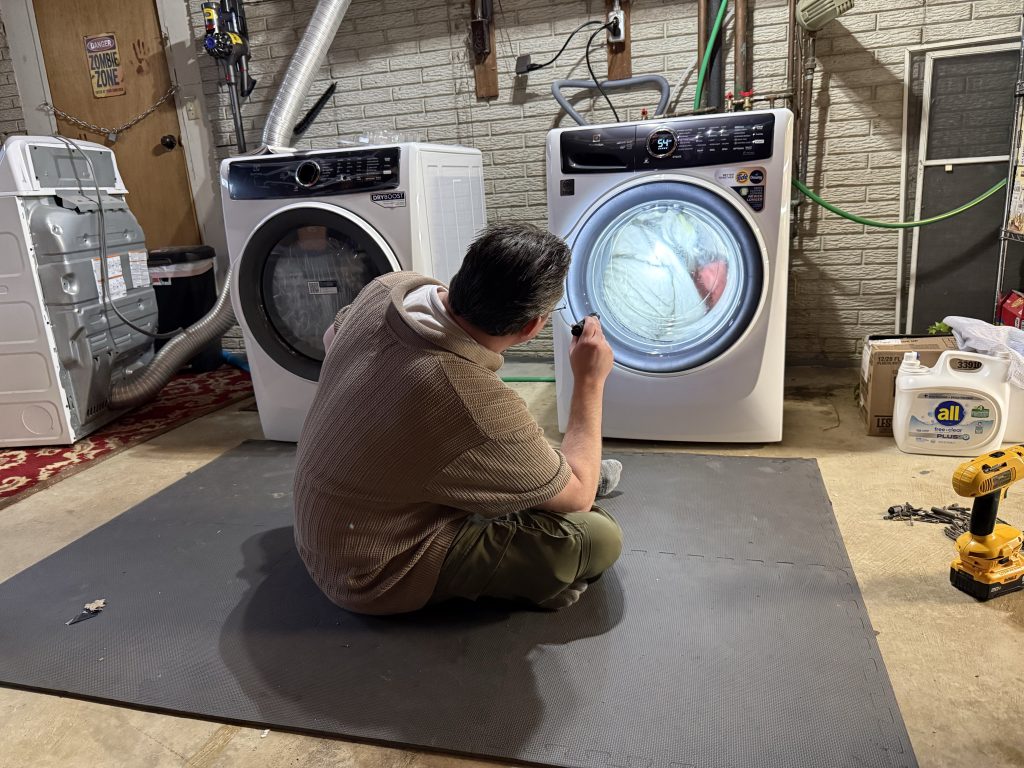
And one such task is moving heavy objects. In this particular case – laundry machines to the basement! Moving these machines was always a bit of a struggle, but no Herculean effort. Then Liz’s new wash machine arrived. It’s the first front-loader we’ve ever had, and as it would turn out, significantly heavier than top-loaders. Its specs weigh in at 217lbs. And the all-steel appliance dolly we borrowed was 50-70lbs. That’s really damn heavy, especially considering that the bottom step of the basement is narrower than laundry machines, requiring one to lift them over the stair ledge on the final push.
We managed it, but I’m paying the price. Next time, younger men are needed.
They’re also entertaining to watch!
Of course, this will be 10 years this summer, at which point I might irreparably break anyway. At least my promise will be fulfilled.
After my recent accomplishment of finally installing bathroom ductwork into proper external vents, I started to reminisce. We will soon hit our 10-year mark in this house, Easement Acres. What began as an American dream turned into a parenthood want: a place for the kid to grow up. And the romanticized homestead activities of decorating and gardening. I wanted a home. I moved a lot myself as a kid, with the longest stint in a Lubbock property – more of a prison, really, with a tiny backyard and a lack of permission to ever venture beyond the privacy fence unescorted. All it needed was some concertina wire to complete the feeling.
But now, with the decade landmark in sight, this will be the longest I have ever lived in one domicile. So I wanted to look back on what I’ve written about in my time here. Or more specifically, what I’ve written about regarding the house itself.
Here’s a chronological list:
2017
Wifi and Ethernet
WFH in my basement setup
Splitting trees removed by BP
Sump pump drainage
Gardening and more trees removed
Rain barrel
Rain barrel #2
Deck staining
Lamppost
Hostile neighbors
Hanging pictures
Basement growing
Electrical outlet install
Putting wire on the fence
New TV stand
Live Christmas tree
2018
Live Christmas tree cleanup
Ring doorbell camera install
Gas leak
New trees planted
Ozone-ing the carpet
Revised basement workstation
Workout equipment acquired
Hallway carpet replaced with laminate
War on dandelions
Property survey
First reel mower
Exploding electrical outlet
Storm door install
Grandfather clock acquired
Basement aquarium acquired
Front porch light install
Dining room carpet replaced with laminate
Fence repair after ice storm
Ethernet patch panel install
2019
Air purifier acquired
Revised basement workstation again
Wired basement desk with ethernet
Backyard Ring camera install
Sump pump drainage upgraded with brick
Lounge carpet replaced with laminate
Foyer tiled
Copper cock added to roof
Rain barrel #3
Sliding backdoor shattered
2020
Sliding backdoor replaced
Second reel mower
Barn star acquired
Wine cellar acquired
Bedroom carpet replaced with laminate
Garage workshop pegboard acquired
Dead spruce trees removed
Retrofitted attic fan install
Neighbor’s plywood palace and city complaint
2021
Wood burner install
Front door lock replaced
Decorative external shutters replaced
Security film installed on garage window
Brick garden edging install
Garden trellis installed to block view of problem neighbor
Additional garage organization
Built the garage door open sensor/indicator
Roomba vacuum acquired
2022
Bathroom fan replacement
Bathroom fan remodel (For some reason, I didn’t post once on this project. I must have been trying to wipe it from my memory).
Broken chest freezer turned into a root cellar
Clematis planted on garden trellis
Easement Acres name formalized
2023
Garden Ring camera install
Deck string lights upgraded
Built deck gate
Built backyard trellis
2024
Removed unnecessary bathroom light fixture
New couch acquired
New HVAC
Mosquito wars
Easement Acres signage
Hurricane damage
Bench vise acquired
2025
Bathroom grips install
New oven acquired
More trees planted
Zombie door
Ox yoke hung
New roof
Built firewood holder
2026
Attic bathroom ventilation ductwork install
Conclusion
A lot of work has been done here on Easement Acres! It’s definitely more than my parents had ever done to their home. I think the difference lies with the generation gap. My home was never a given. There was a lot of doubt we’d ever get to have one at all! So every day is a new opportunity to, again, partake in the ultimate hobby! It’s not simply a place to live.
I like breathing. I wasn’t exactly consulted in the design of terrestrial animalia metabolic function, but breathing is a required component in the process of oxidizing hydrocarbons for cellular energy nonetheless. So it would follow that such a necessary and constant action should be made somewhat pleasant, right?
Why then does laziness and cheapness persist to make the process unpleasant? Why as a people would we not choose to band together and make air quality a priority? (Beyond the obvious monetary implications, that is.)
I complained about this when I originally discovered the bathroom fans exhausted into nowhere. Actually, I discovered one fan. The other fan I would later find to be buried completely under insulation. Both fans vented to the attic. Both lacked hoses. And one was covered. Not very effective.
The one fan I could find I attached to a flexible duct line and routed it to the top of the attic, but with no exterior vent hookup, I instead retrofitted a rotary fan onto a passive vent in order to vent the whole attic. It sort of worked, but eventually the fan rusted and seized. Back to square one.
The next phase of the saga revealed the hidden location of fan #2 when what I assumed was the master bathroom fan turned out to be the guest bathroom fan when I ripped it out of the ceiling to figure out why it wasn’t ventilating. Peering down from the attic into the wrong bathroom was an unpleasant surprise. I finally located the master bathroom fan by shoving a wire up beside it and having Liz wiggle it while I scanned the attic for movement.
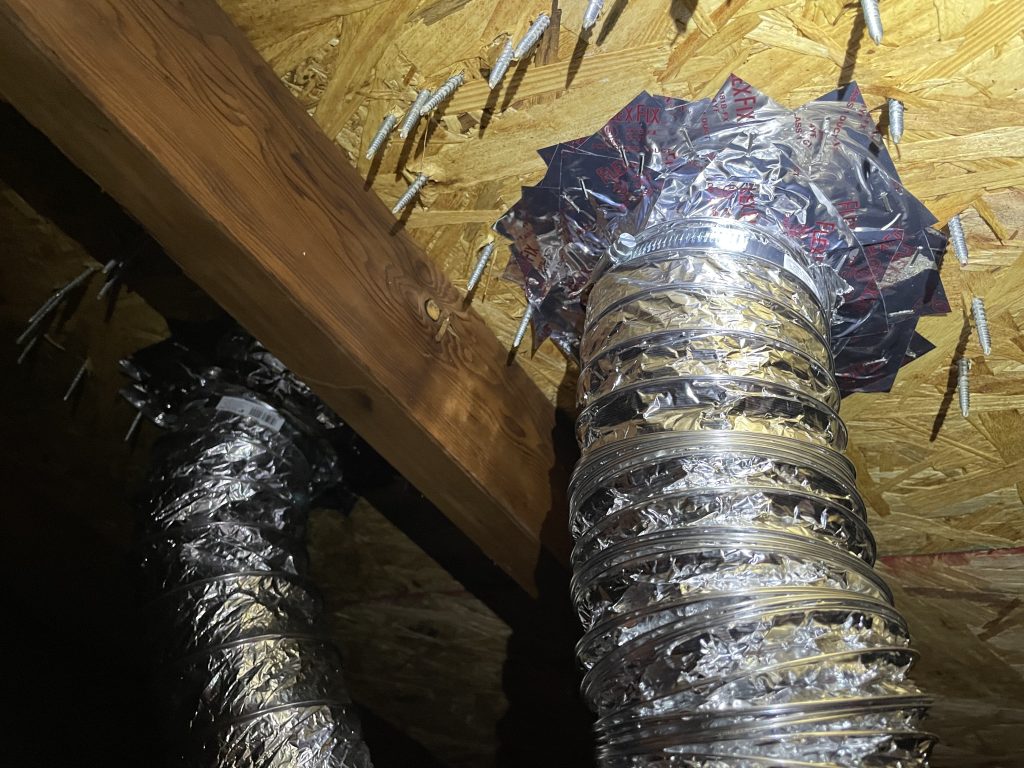
Both fans got replaced with ducts added. But again, with no external connection point, they vented into the attic for several years, awaiting a proper solution. Eventually, the proper solution came with the new roof. The installers, being very accommodating, added external vents for me – one for each bathroom and one for a future kitchen vent hood project. Huzzah. I triumphantly scampered up to the attic to finally connect the hoses, and was greeted by the sight of a square hole under the vents. Apparently, they’re universal external vents, meant to be fitted with connectors, but not including them by default. Damn. Had I known that, I would have fitted connectors to the old roof’s passive vents, which probably would have been a net gain even though I’d be sacrificing full attic venting capacity. Oh well. At least now I can do it proper.
And the internet told me that this is a very normal scenario, with the easy fix recommending bolting on vent collars and filling the gaps with that heat-resistant foil dryer vent tape. And go figure – that worked just fine. Duct work, unlike plumbing, is surprisingly imprecise. Tape, is part of the standard toolkit.
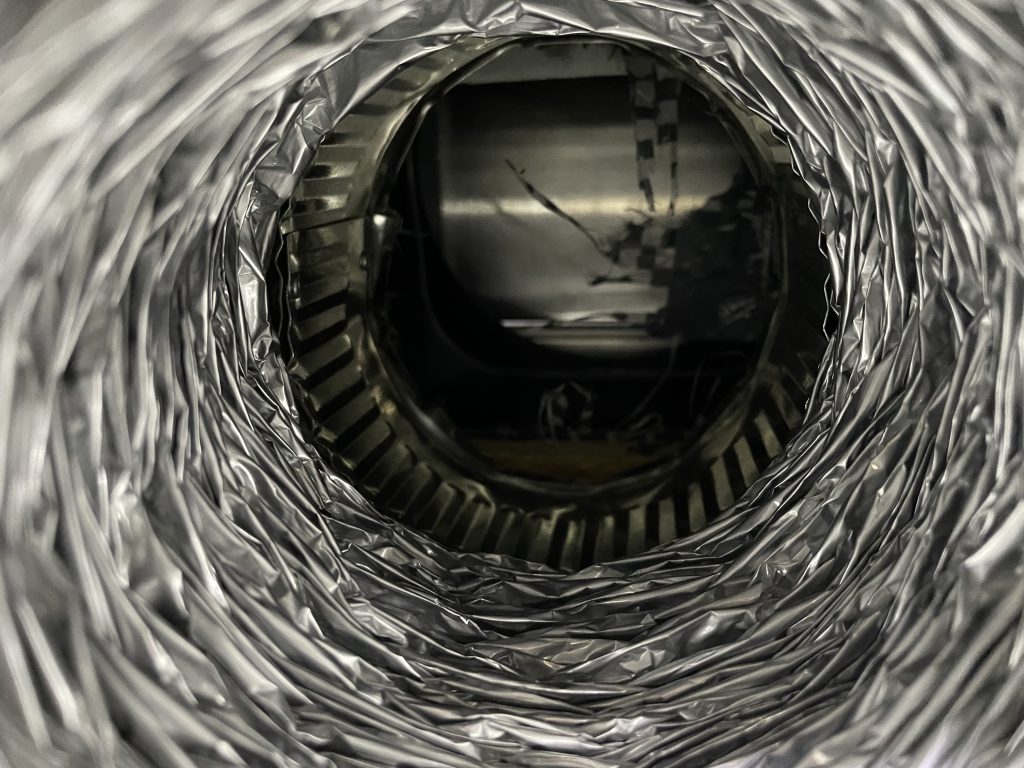
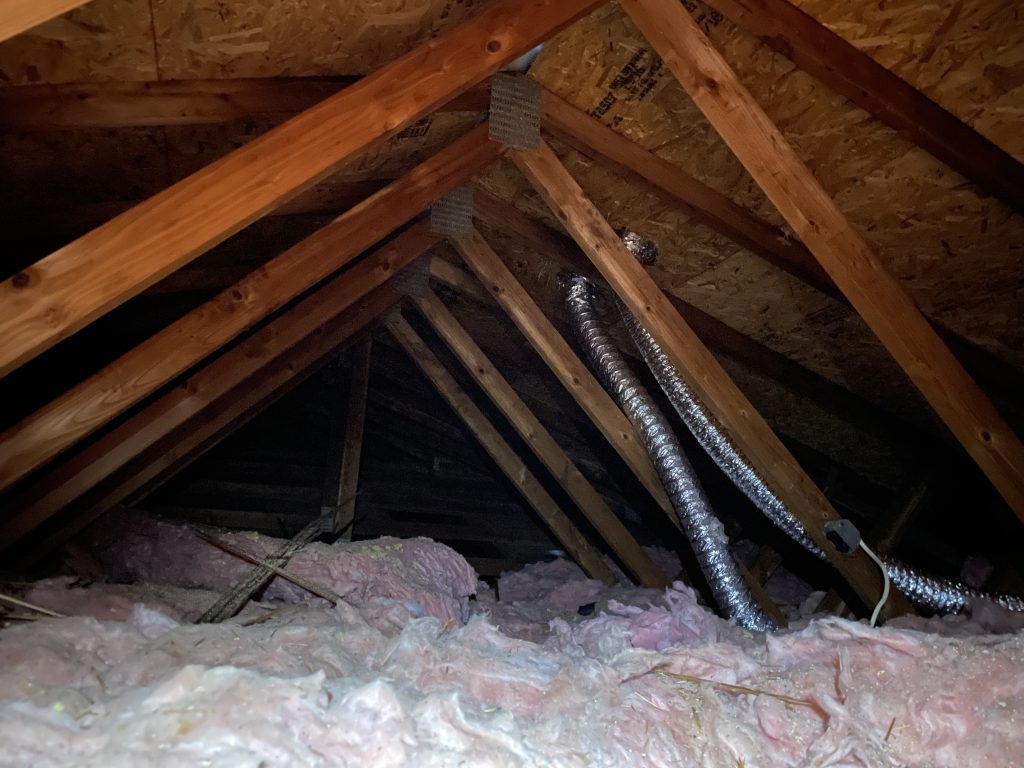
I should have taken some more “before” pics, but I was choking in the dust and trying to wrap this decade-long project up ASAP. But here’s what it looks like inside:
Here’s the guest bathroom fan. I had the foresight to install a 120CFM beast, even though the size of the bathroom only needed an 80. But with a shared bathroom for anyone visiting, expeditious air evacuation is of paramount priority:
And a final shot of both ducts connected! At last!
Side note: with no shingles on a metal roof, the attic ceiling isn’t studded with thousands of skull perforators. I can safely stand up higher than I ever dared before! The only blood shed on this project was from the sharp metal edges on the collars.
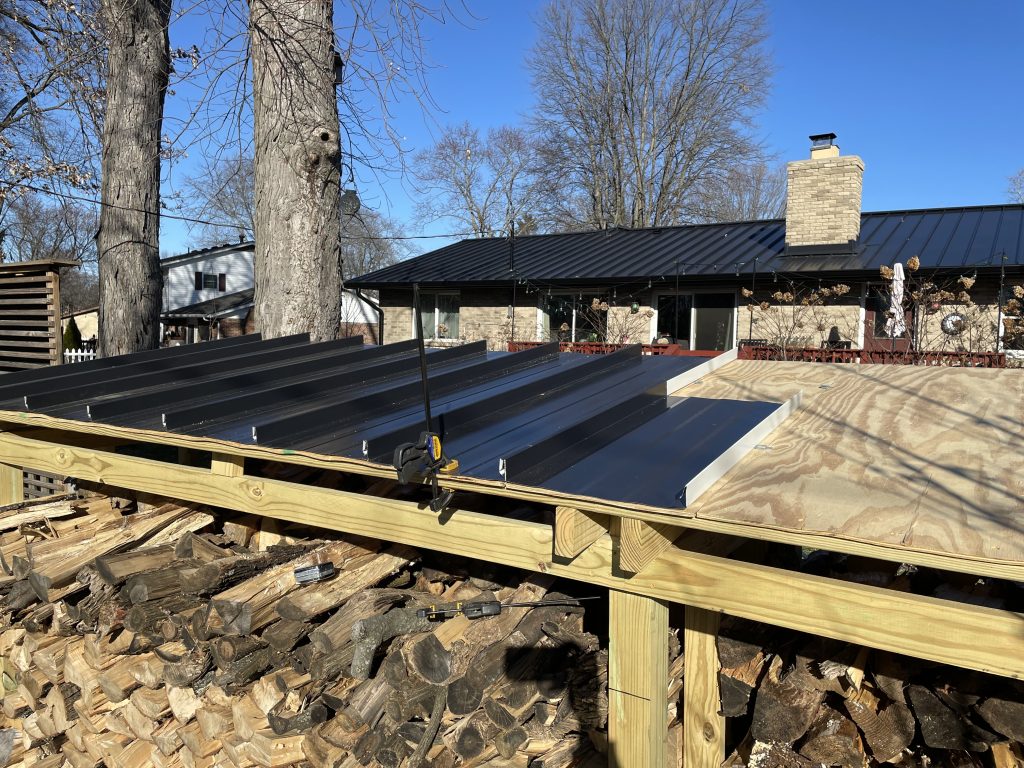
At last, with the holiday break, I was able to revisit the firewood holder. The warping OSB was concerning, but ultimately proved not to be an issue once I started attaching the metal. First though, I had to measure and cut it.
Sawing through metal paneling such as this was a new experience. It was too tough for any of my originally-planned methods, but with some protective gear and strong nerve on my part, the miter saw ended up suitable for the job. The screeching of metal on metal was horrendous, and the saw’s reach was insufficient, forcing me to make multiple cuts on each section. And no doubt the blade’s completely shot now and I’ll need to replace it. But, it did eventually work.
And by good fortune, full panel width almost lined up, with just a couple inches of overlap, so I didn’t have to attempt a longitudinal cut. Sometimes, I do luck out.
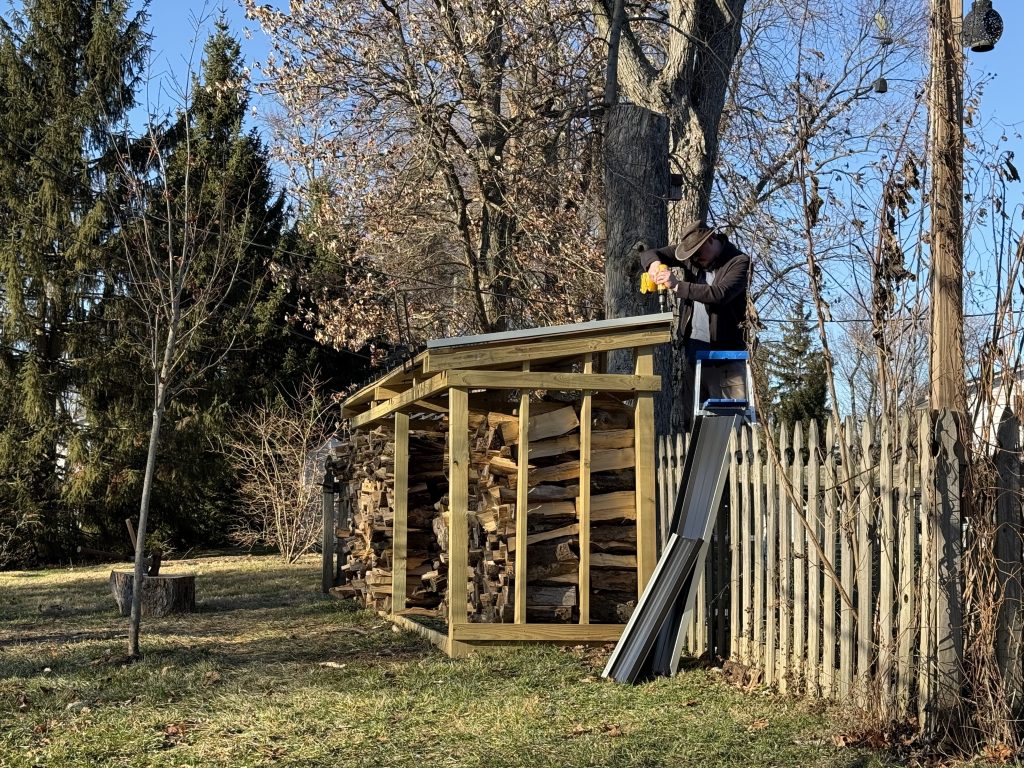
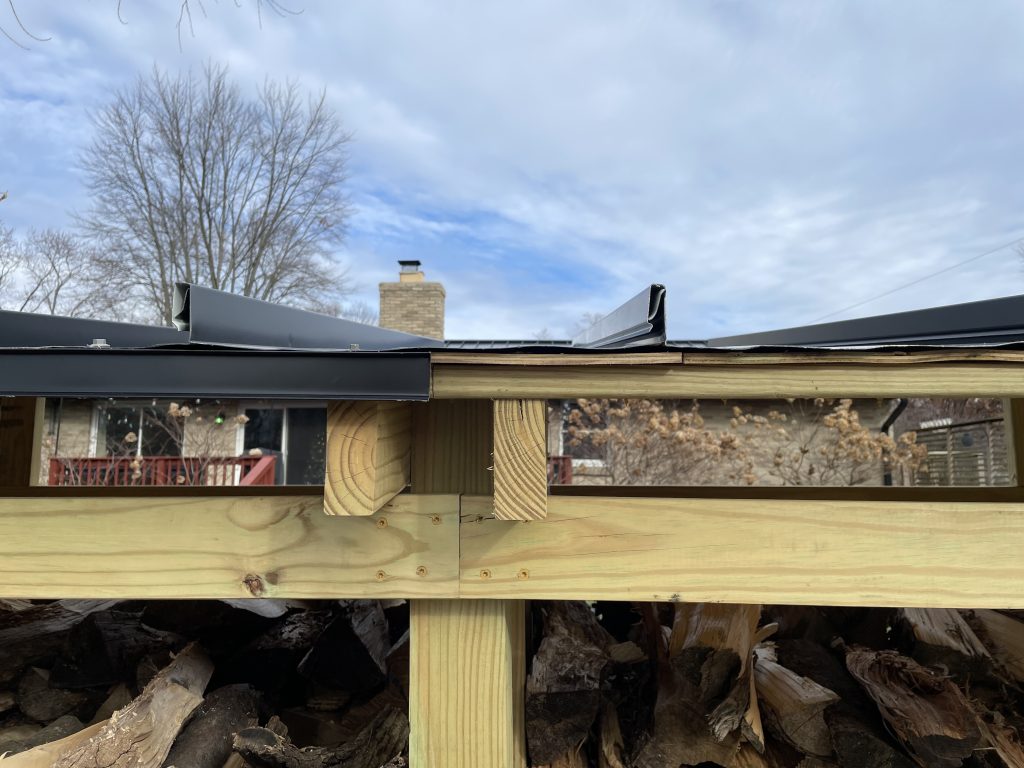
But as these were not full panels, they lacked the undercurve. They’re designed to hook under the eaves so no hardware is exposed skyward, but as I didn’t have 15 full panels to work with, that wasn’t an option and I had to screw them directly in. I wasn’t concerned. It is just a wood pile. Even if they leak over time, it’s a non-issue.
However, I did still use proper roofing screws – the ones with that synthetic washer that self-seal.
First though, I slid a drip guard under the downward edge, more for aesthetics than concern of water infiltration. I mean, I didn’t install felt or insulation between the metal and wood. I draw the line at overkill somewhere. But either way, it’s an improvement.
Then I added flashing at the peak, this time because I was concerned with water.
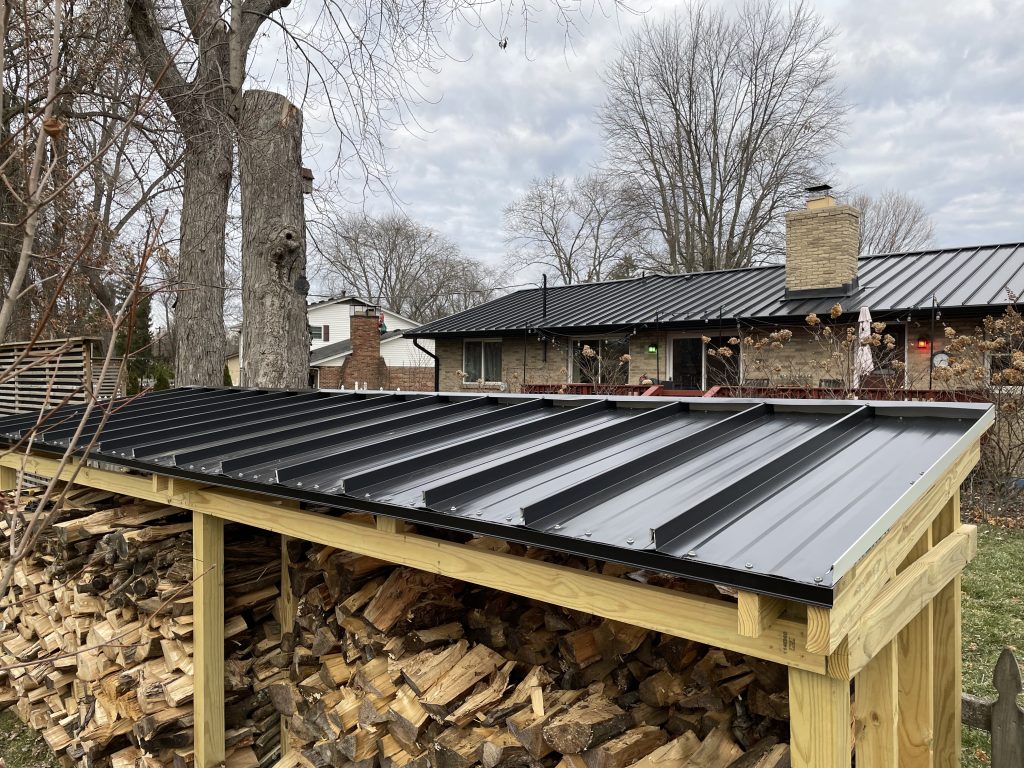
And lastly, I spray-painted all the metal parts that weren’t black, to make a nice purdy finish.
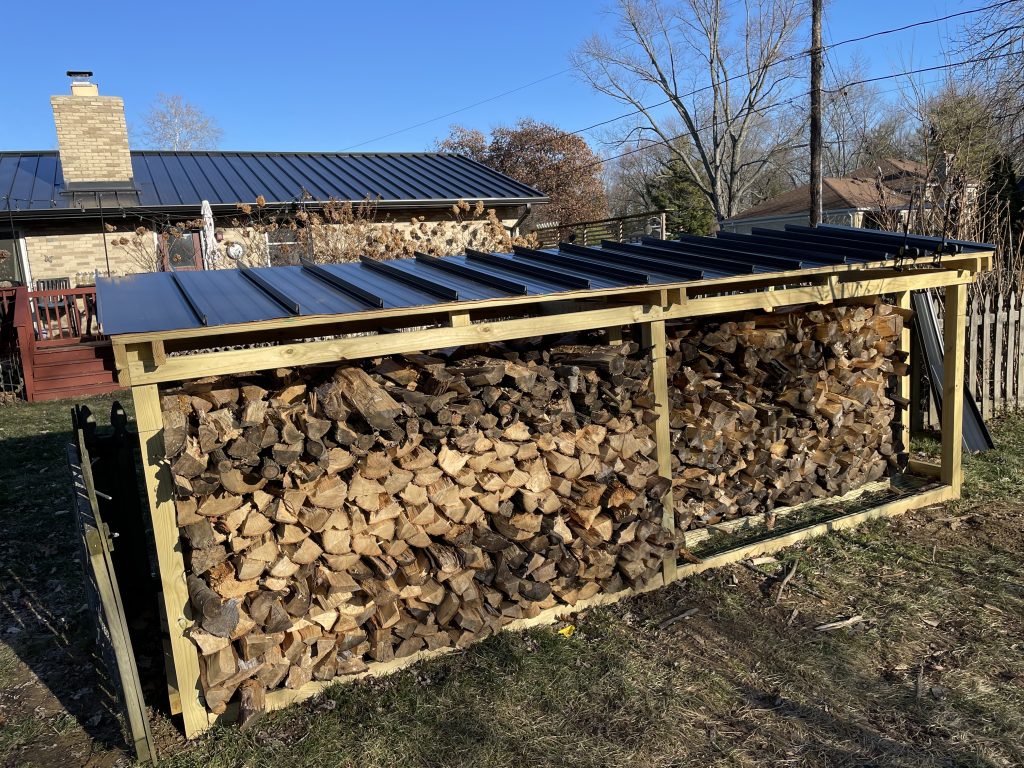
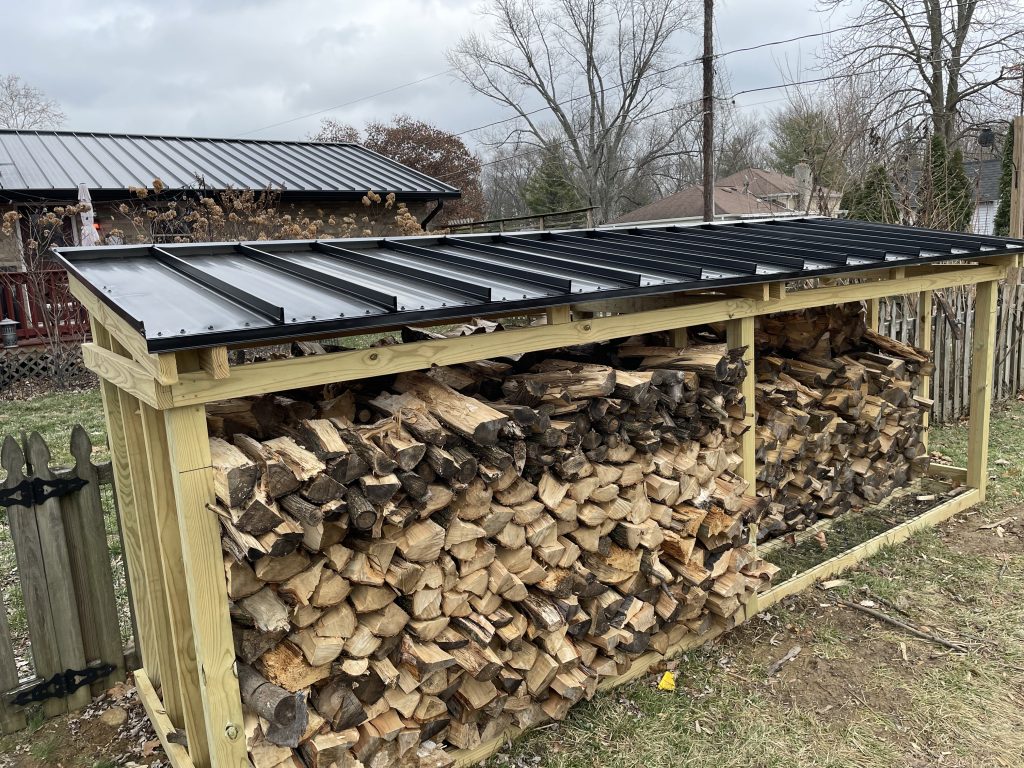
I have yet to see anyone else in the neighborhood with a custom-built firewood holder in their backyard, or a metal roof on their house – much less a custom-built firewood holder with a matching metal roof. I guess normal people spend their time and money elsewhere.
But I’m not a normal person, and I have an awesome firewood holder now. Ten years in the backlog and two months in the making. At last!